
See all blog posts in this series:
- OpenShift Virtualization on IBM Cloud, part 1: Introduction
- OpenShift Virtualization on IBM Cloud, part 2: Becoming familiar with VPC
- OpenShift Virtualization on IBM Cloud, part 3: Deploying ROKS, ODF, and OCP Virt
- OpenShift Virtualization on IBM Cloud, part 4: Creating a virtual machine
- OpenShift Virtualization on IBM Cloud, part 5: Migrating a virtual machine
- OpenShift Virtualization on IBM Cloud, part 6: Backup and restore
- OpenShift Virtualization on IBM Cloud, part 7: Dynamic resource scheduling
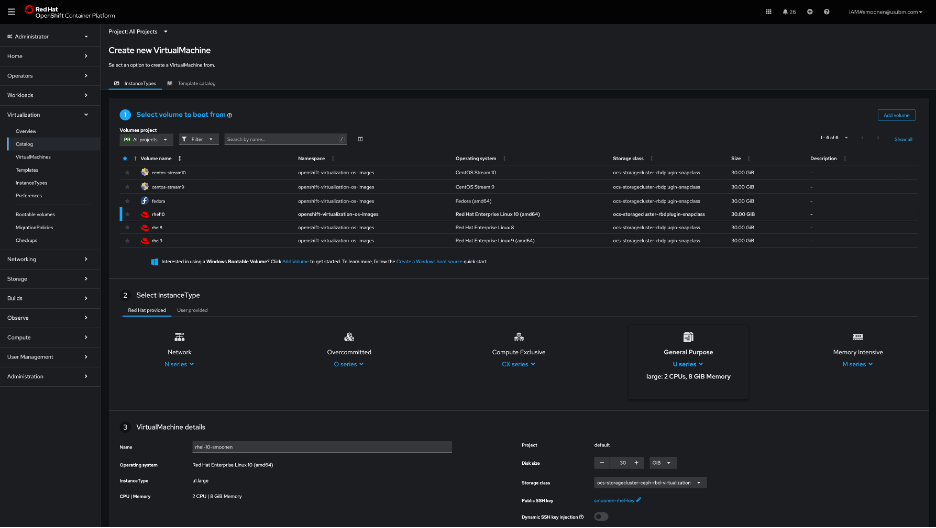
I had some initial difficulties creating a virtual machine from the OpenShift web console UI in the Virtualization | Catalog page, but later this worked okay. Here is a screenshot of that page, but in this post I will document a command-line approach.
For my command-line approach, I first used ssh-keygen to create an SSH key pair, and then created a secret based on the public key:
oc create secret generic smoonen-rsakey --from-file=rhel-key.pub -n=default
I then created a YAML file, referencing this secret, and with the help of the example YAML generated by the OpenShift console UI. Here is my configuration:
apiVersion: kubevirt.io/v1
kind: VirtualMachine
metadata:
  name: rhel-10-smoonen5
  namespace: default
spec:
  dataVolumeTemplates:
    - metadata:
        name: rhel-10-smoonen5-volume
      spec:
        sourceRef:
          kind: DataSource
          name: rhel10
          namespace: openshift-virtualization-os-images
        storage:
          resources:
            requests:
              storage: 30Gi
  instancetype:
    name: u1.large
  preference:
    name: rhel.10
  runStrategy: Always
  template:
    metadata:
      labels:
        network.kubevirt.io/headlessService: headless
    spec:
      domain:
        devices:
          autoattachPodInterface: false
          disks: []
          interfaces:
            - masquerade: {}
              name: default
      networks:
        - name: default
          pod: {}
      subdomain: headless
      volumes:
        - dataVolume:
            name: rhel-10-smoonen5-volume
          name: rootdisk
        - cloudInitNoCloud:
            userData: |
              #cloud-config
              chpasswd:
                expire: false
              password: xxxx-xxxx-xxxx
              user: rhel
              runcmd: []
          name: cloudinitdisk
      accessCredentials:
        - sshPublicKey:
            propagationMethod:
              noCloud: {}
            source:
              secret:
                secretName: smoonen-rsakey
I applied this by running the command oc apply -f virtual-machine.yaml.
Connecting to the virtual machine
I relied on this blog post which describes several methods for connecting to a virtual machine.
I chose to use virtctl/SSH. Steps:
- Login to OpenShift web console
- Click question mark icon in top right and select Command Line Tools
- Scroll down and download
virtctlfor your platform. - If you are on a Mac, follow the same steps performed earlier with
octo allowvirtctlto run.
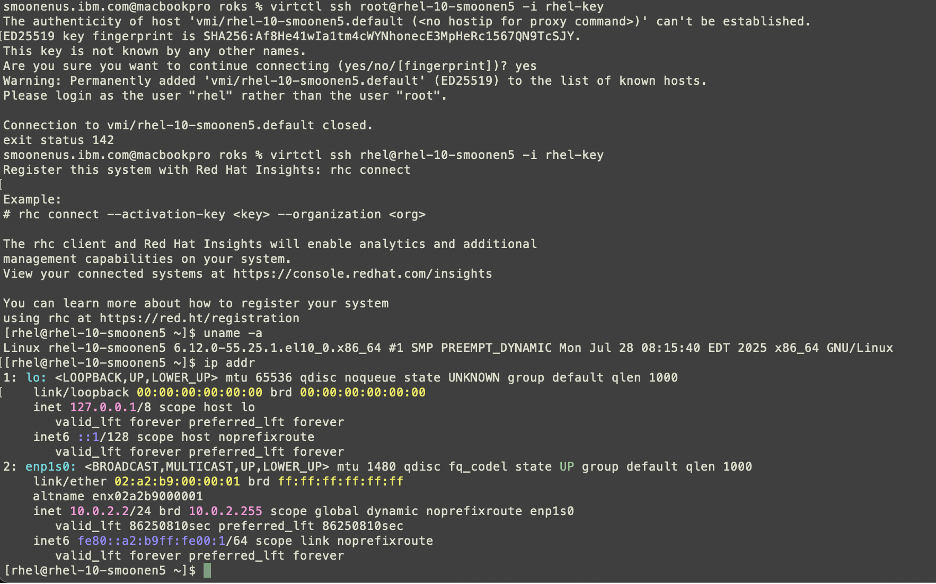
Here you can see me connecting to my virtual machine.
Performance
Be sure to read Neil Taylor’s blog posts referenced in the first post in this series, which explain why this has an address of 10.0.2.2.
As it stands it can reach out to the public network, since I configured a public gateway on the worker nodes’ subnet. Although I believe I have entitlement to run RHEL on these workers, the VM is not initially connected to a Satellite server or to any repositories. I wanted to run a quick iperf3 test, but this makes it not as simple as doing a yum install. I was able eventually to snag libsctp and iperf3 RPMs and ran a simple test. Compared to a VMware VM running on VPC bare metal, the ROKS VM gets comparable throughput on iperf3 tests to public servers.
As I receive more insight into the RHEL entitlement I will document this.
Inbound connectivity to VM
NLB (layer 4) does not currently support bare metal members. Therefore we need to create an ALB (layer 7). I created a public one just to see how that works. I’m reasoning through what I need to build based on Neil’s blog and IBM Cloud documentation.
Here is the YAML I constructed:
apiVersion: v1
kind: Service
metadata:
  name: smoonen-rhel-vpc-alb-3
  annotations:
    service.kubernetes.io/ibm-load-balancer-cloud-provider-ip-type: "public"
    # Restrict inbound to my IPs
    service.kubernetes.io/ibm-load-balancer-cloud-provider-vpc-security-group: "smoonen-jump-sg"
spec:
  type: LoadBalancer
  selector:
    vm.kubevirt.io/name: rhel-10-smoonen5
  ports:
  - port: 22
    protocol: TCP
    targetPort: 22
Importantly, you should not specify the service.kubernetes.io/ibm-load-balancer-cloud-provider-vpc-lb-name annotation; what IBM Cloud calls a persistent load balancer. This reuses an existing load balancer of that name if it exists. So, for example, if you have a scenario where you are testing restore of an application to a new and temporary namespace, it will hijack the load balancer for your running application.
After provisioning this, I was able to successfully SSH into my VM with the load balancer resource that was created.

