IBM and Kyndryl have in the past used Entrust BoundaryControl to accomplish geofencing. This worked using a combination of their CloudControl and KeyControl products. The CloudControl product was used by security administrators to install cryptographically signed tags into known trusted host TPMs, and then to describe policies for virtual machines that required them to run on hosts with particular tags. In addition to CloudControl enforcing virtual machine placement, the KeyControl product further integrated with this configuration to ensure that virtual machines running on unapproved hosts could not be successfully decrypted and run. Customers could devise tagging schemes according to their needs, such as prod/nonprod, tier1/tier2, and US/EU.
You can accomplish a similar kind of exclusion or geofencing capability using VMware’s vSphere Trust Authority. Although vTA is designed primarily as a means of ensuring that workloads run on hosts with known trusted firmware and software levels, it also has the capability to trust hosts individually. Rather than trusting the vendor TPM CA certificate, you can trust individual host TPM certificates. This allows you to vet the hosts one by one in your environment, and mark them as trusted only if they meet your criteria, including their geographic location. vTA will then help to ensure that the virtual machines in your environment cannot be successfully decrypted and run on hosts outside of your trusted set.
Like any security solution, attestation and geofencing solutions like BoundaryControl and vTA require extra effort to configure and to administrate. In exchange for this effort, however, you can create compelling sovereign cloud solutions.
Here are a few key things to know about Broadcom’s vDefend firewall offering:
vDefend comes in three flavors: firewall, ATP, and firewall+ATP bundle. The ATP license is not designed to be used on its own, but only to stack ATP capability on top of firewall capability in cases where you have not purchased the bundle.
If you are using a vSphere 8 VCF solution key to activate NSX, you will need a vDefend “solution key” to activate vDefend features. Otherwise, if you are using a v7 or v8 component key to activate NSX, you will need to use separate vDefend “component keys” to activate the vDefend features on edges and in distributed firewall, respectively. For more information, see KB 318444.
Broadcom assesses vDefend for distributed firewall against the vSphere hosts in the same manner as VCF (i.e., with a floor of 16 cores per CPU). For distributed firewall you should order as many cores of vDefend as for VCF. For edge firewall, Broadcom assesses vDefend at a ratio of 4 cores per vCPU (including passive edge VMs). There is not a technical reason for this ratio; it is simply a business decision on Broadcom’s part.
If you are running NSX 4.1 or newer, Broadcom has recently published a script that you can use to survey your environment’s firewall configuration to measure how much vDefend licensing you need; see KB 395111. This script correctly takes into account some cases where Broadcom does not assess vDefend usage; for example, if gateway firewall is enabled but only the default permit-all rule is configured, or only stateless rules are configured.
PR 3477772: Encrypted virtual machines with active Change Block Tracking (CBT) might intermittently power off after a rekey operation
Due to a race condition between the VMX and hostd services for a specific VMcrypt-related reconfiguration, encrypted VMs with active CBT might unexpectedly power off during a rekey operation.
This issue is resolved in this release.
From what I can tell, this issue is not currently fixed in the vSphere 7 stream.
In recent builds of vSphere 7 and vSphere 8, my team has experienced unexpected spontaneous reboots of virtual machines while rekeying them. In our case we were rekeying these machines against a new key provider.
EDIT:Broadcom support has now published KB 387897 documenting this issue. The issue is a kind of race condition between the rekey task and some other activity that is touching the changed block tracking (CBT) file for the virtual machine. Under some conditions the latter activity fails to open the CBT file, and vSphere HA reboots the virtual machine.
The reboots seem unpredictable. Although we are using CBT for backup, we had no in-flight backup job running at the time (since you cannot rekey a virtual machine with snapshots). At times as few as 1% of the rekeyed machines were spontaneously rebooted, but at other times as high as 20% were affected.
We understand that Broadcom will fix this race condition in a future release, but in the meantime if you plan to rekey a virtual machine that is using CBT for backup or replication, you should either:
Perform an orderly shutdown of the virtual machine if you cannot tolerate a spontaneous reboot, or
Disable CBT for the duration of the rekey. You need to evaluate whether your BCDR software can tolerate this, or if you need to perform a full backup or replication to recover from the loss of CBT.
Here I collect some blog posts with vCenter key provider configuration recommendations:
If you plan to rekey your vSphere-encrypted virtual machines, you should understand and prepare for the possibility that they may be unexpectedly rebooted
By doing this you will not have to reconfigure trust as frequently, nor will you need to purge expired keys from your trust store as frequently
This also corrects rare situations where the end-entity certificates for your KMIP server may vary from time to time (e.g., if there are several servers with differing certificates behind a load balancer)
I’ve seen a number of cases where vCenter issues intermittent KMS connectivity alarms. This often happens in environments where the network or KMS latency is relatively high. One tip provided by VMware / Broadcom support is to remove expired KMS certificates from the vCenter trust store. This is only my impression, but as best as I can tell, these expired certificates do not prevent successful connectivity, but they can contribute to an increased processing delay which is more likely to trigger health alarms.
If you are experiencing one of the following alarms intermittently, you should consider a cleanup of expired CA certificates:
Certificate Status
Key Management Server Health Status Alarm
KMS Server Certificate Status
Broadcom support referred us to the following Knowledge Base articles to view and remove certificates from the vCenter trust store:
The IBM Cloud Key Protect key management offering has introduced a native KMIP provider to replace the existing “KMIP for VMware” KMIP provider. This new native provider has the advantage of:
Improved performance because KMIP-to-key-provider calls are closer in network distance and no longer cross service-to-service authorization boundaries.
Improved visibility and management for the KMIP keys.
IBM Cloud’s Hyper Protect Cryptographic Services (HPCS) offering is exploring the possibility of supporting native KMIP providers as well. Stay tuned if you are a user of HPCS.
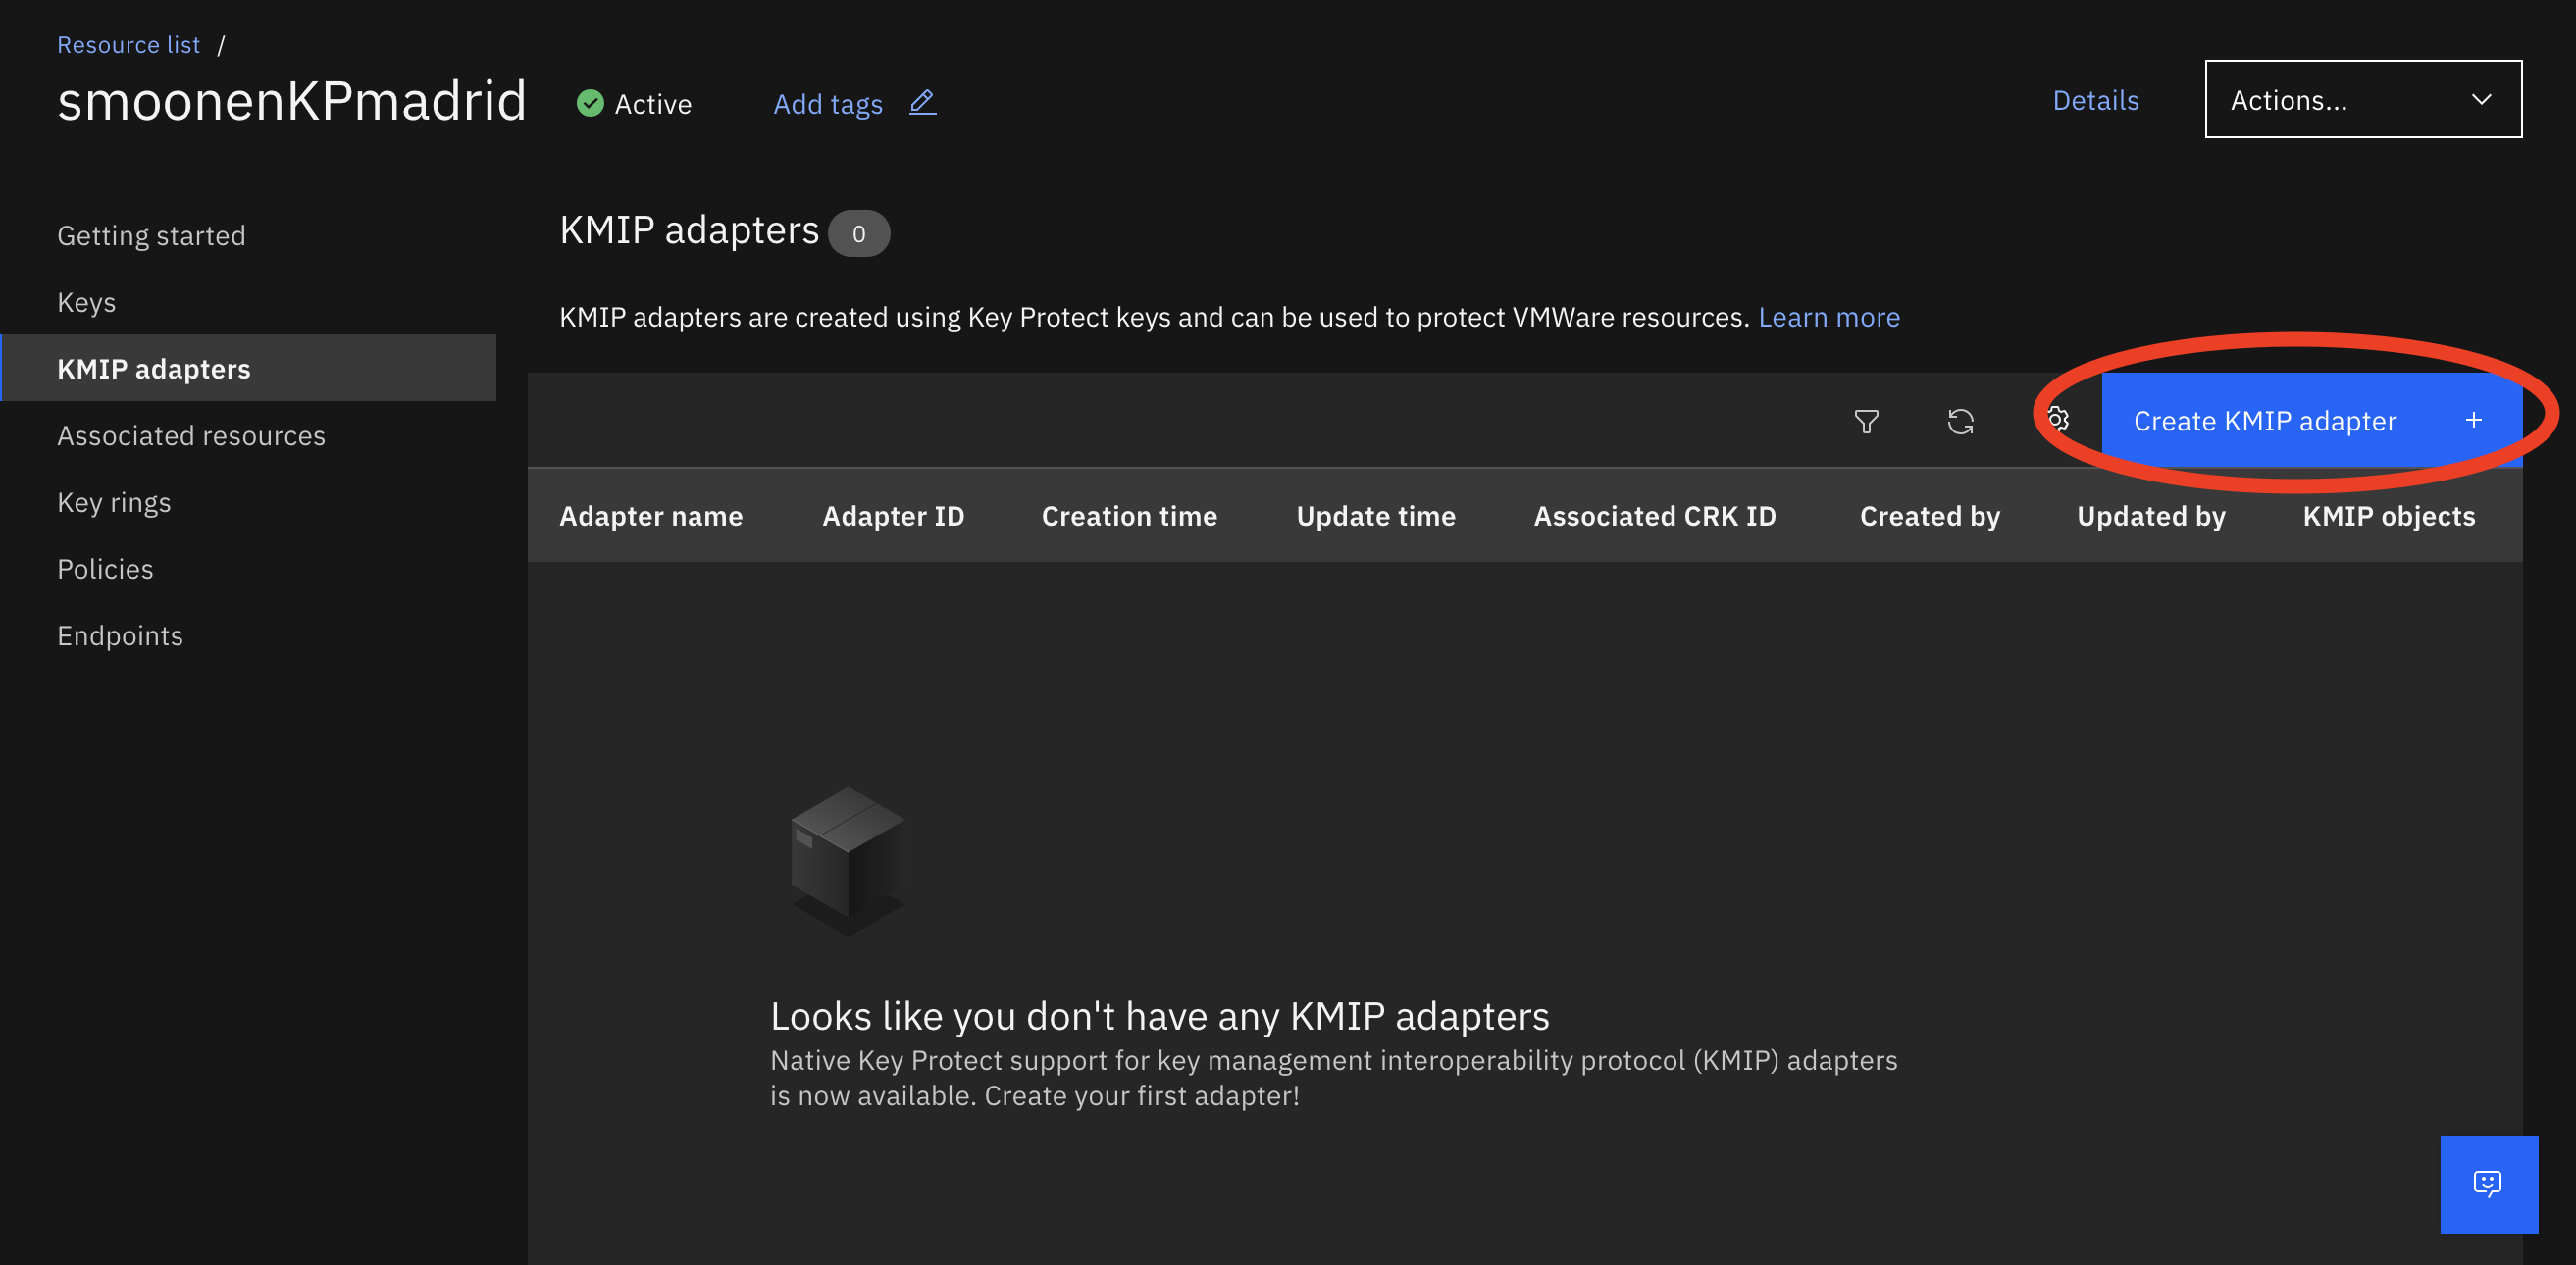
If you already use the KMIP for VMware provider with Key Protect, you should switch to the new native provider for improved performance. Here’s how you can migrate to the new provider.
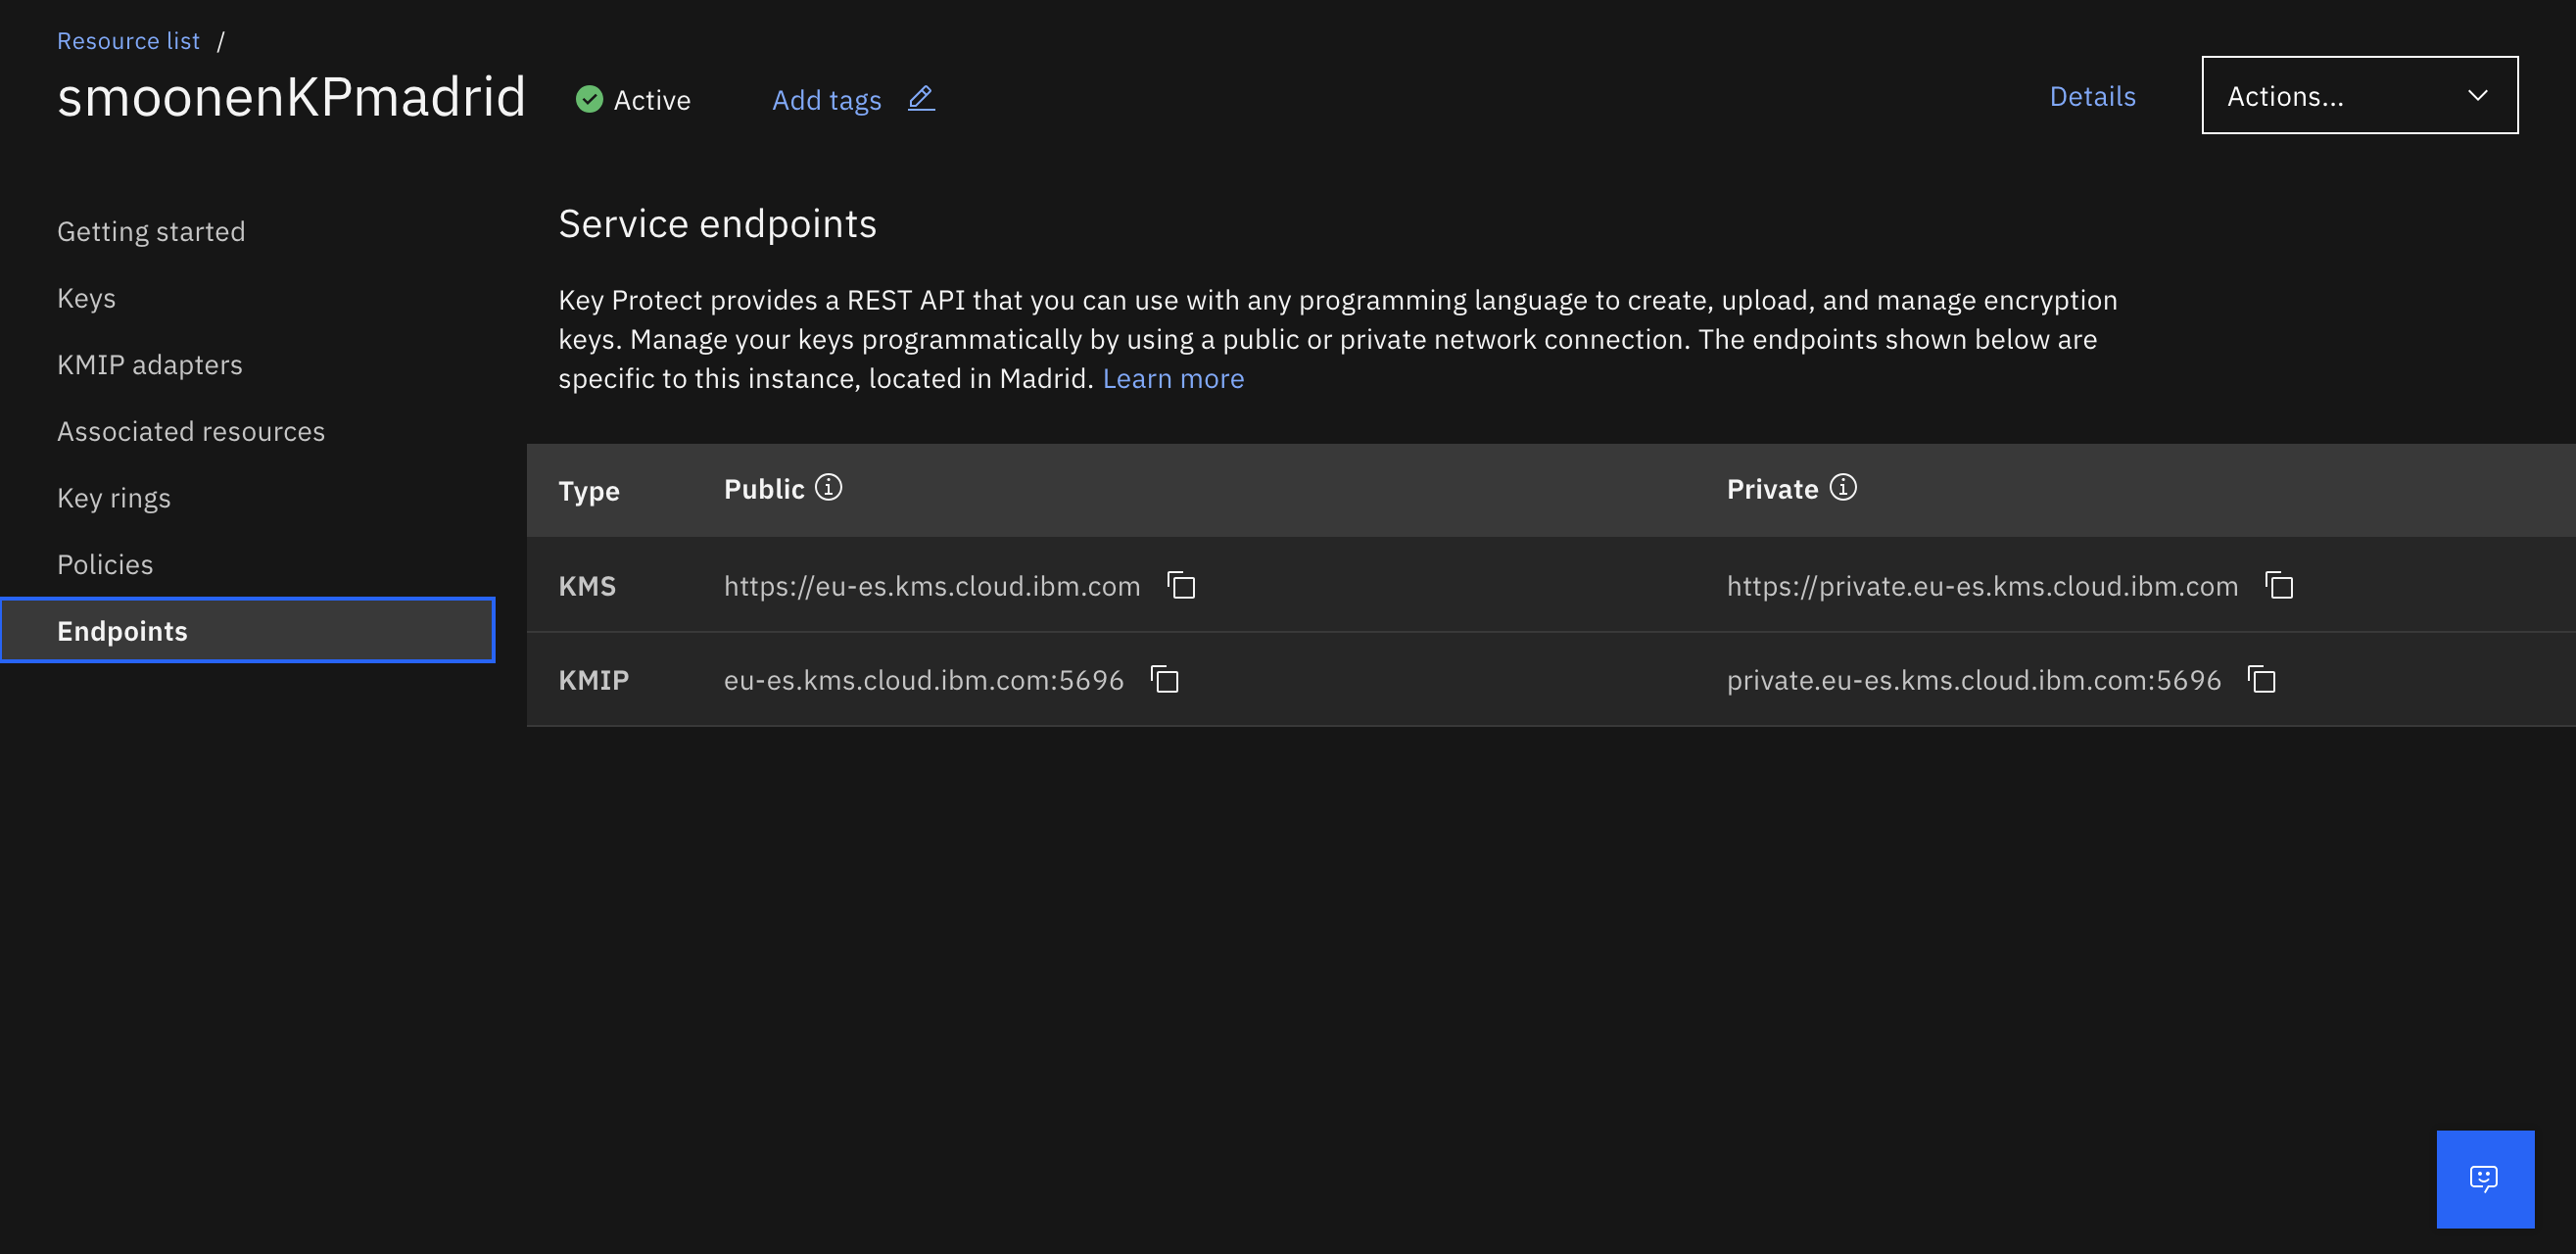
Click the Endpoints tab to identify the KMIP endpoint you need to configure in vCenter:
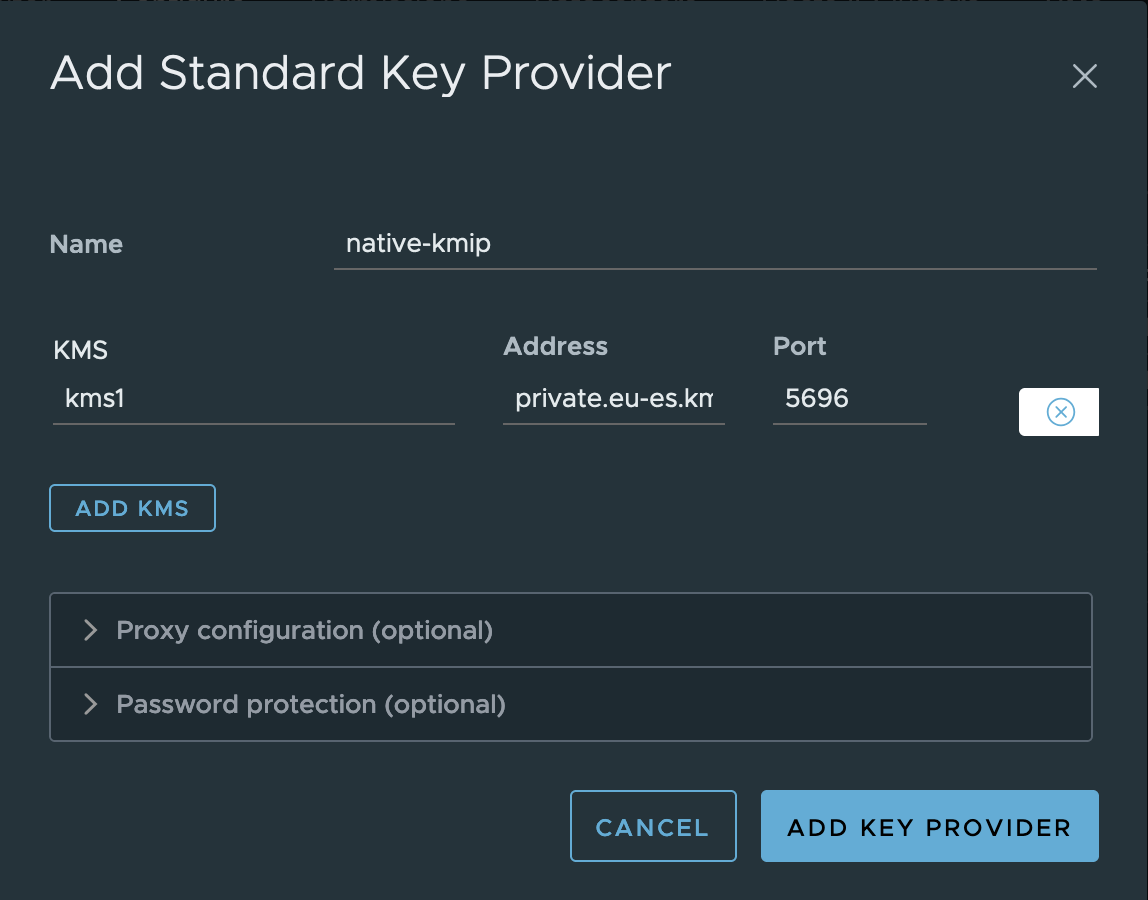
Note that, unlike the KMIP for VMware offering, there is only one endpoint. This single hostname is load balanced and is highly available in each region. Now go to vCenter, select the vCenter object, select Configure | Key Providers, then add a standard key provider:
Examine and trust the certificate:
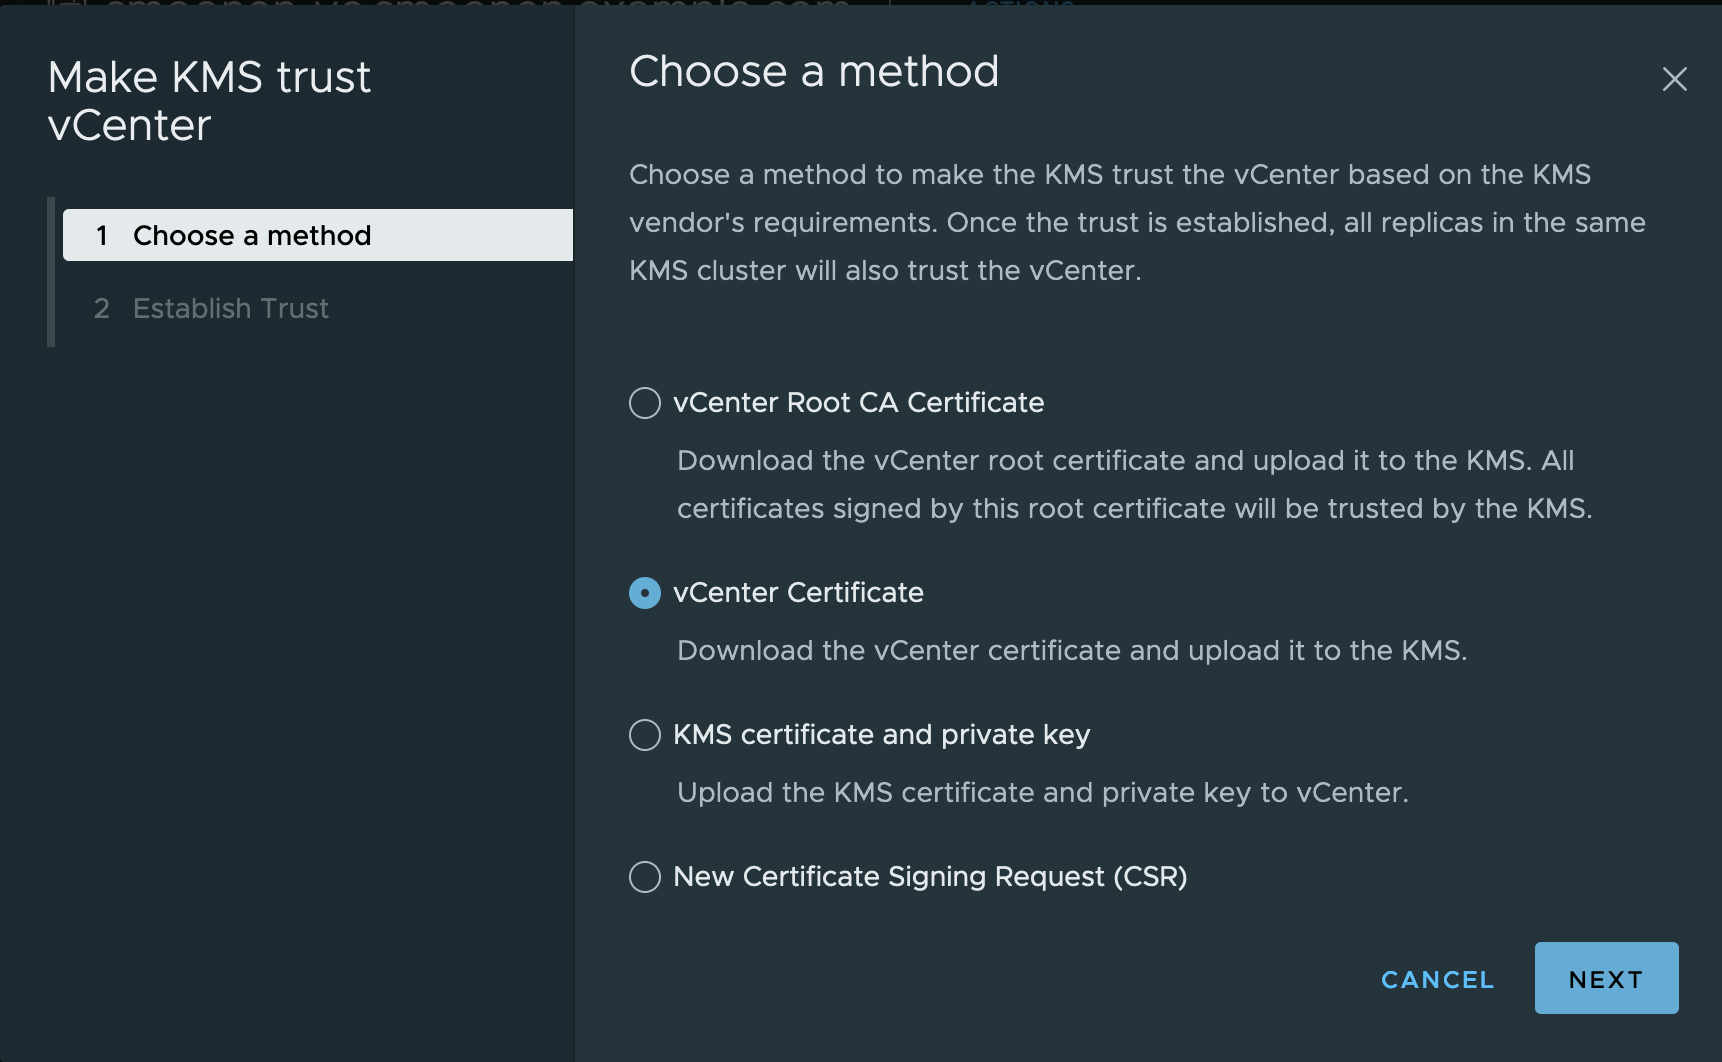
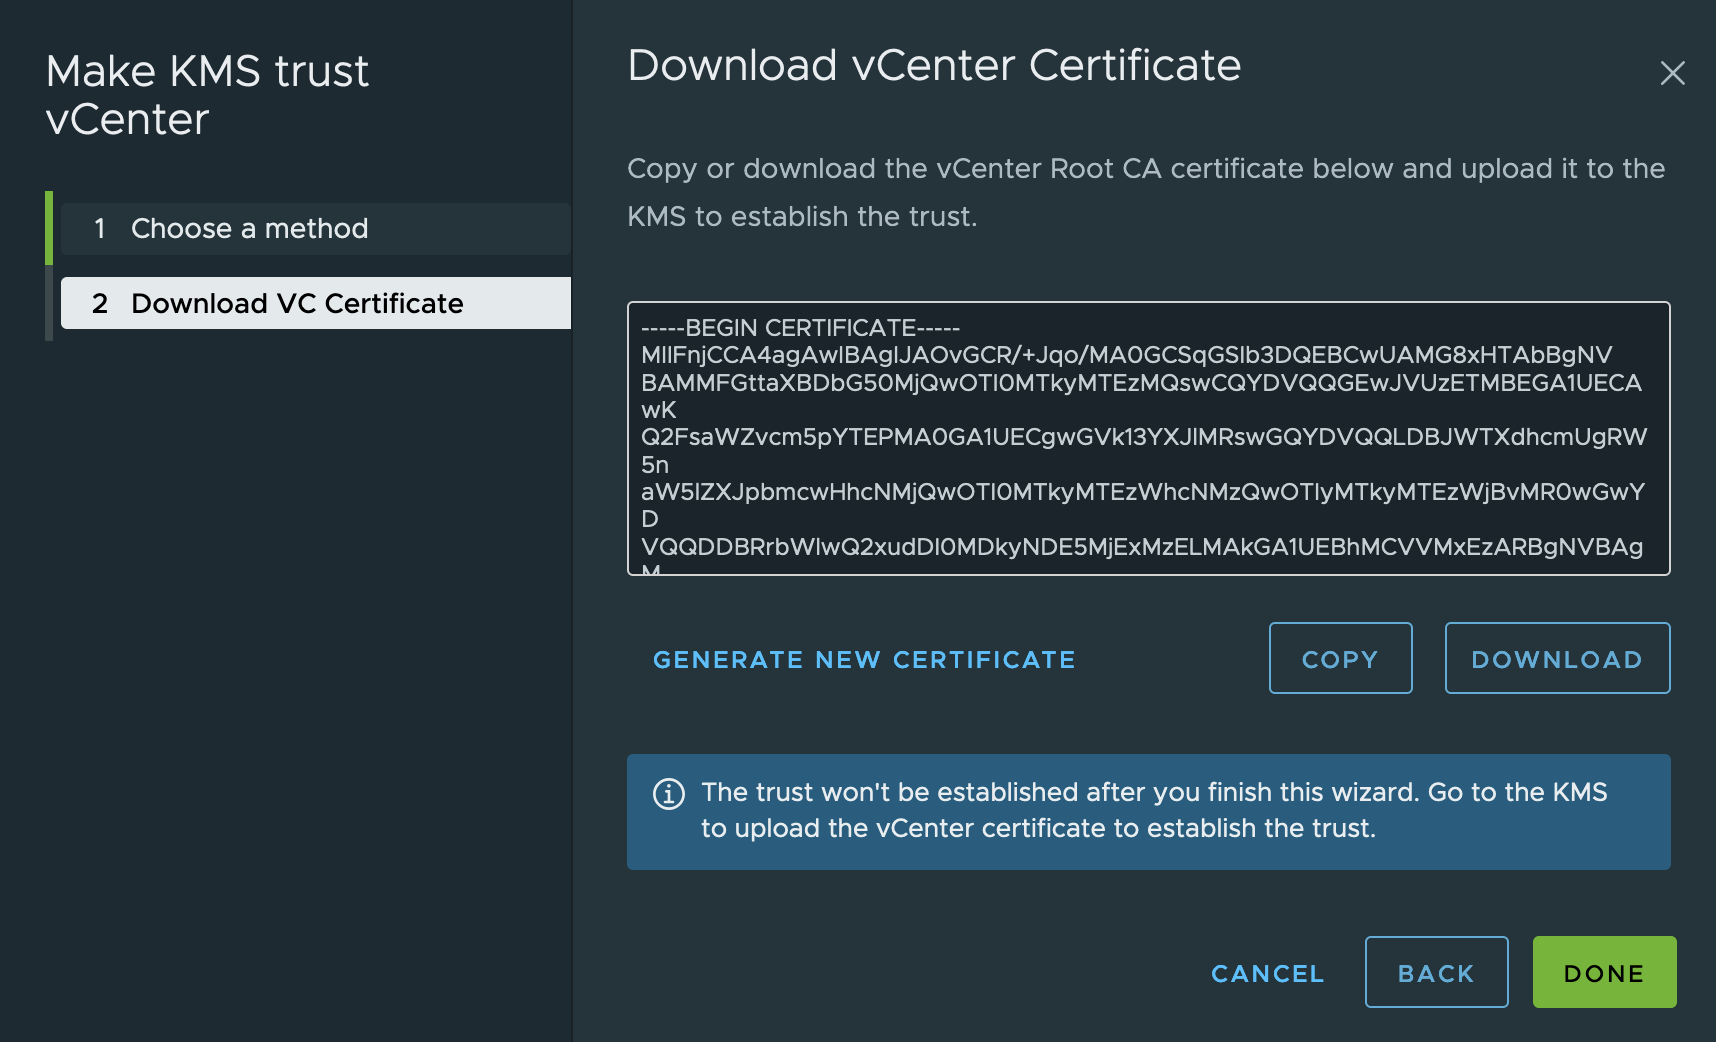
Now select the new key provider, and select the single server in the provider. Click Establish Trust | Make KMS trust vCenter. I prefer to use the vCenter Certificate option which will generate a new certificate just for this connection.
Remember to wait a few seconds before copying the certificate because it may change. Then copy the certificate and click Done:
Importantly, at this step you need to follow my instructions to reconfigure vCenter to trust the KMIP CA certificate instead of the end-entity certificate. You should do this for two reasons: first, you won’t have to re-trust the certificate every time it is rotated. More importantly, in some cases the native KMIP provider serves alternate certificates on the private connection, and this can confuse vSAN encryption. (The alternate certificates both includes the private hostname among their alternate names, so they are valid. The underlying reason for this difference is because VMware is in the process of adding SNI support to their KMIP connections, and the server behavior differs depending on whether the client sends SNI.) Trusting the CA certificate ensures that the connection is trusted even if the alternate certificate is served on the connection.
Then return to the IBM Cloud and view the details of your KMIP adapter:
Select the SSL certificates tab and click Add certificate:
Paste in the certificate you copied from vCenter:
Back in vCenter, it may take several minutes before the key provider status changes to healthy:
First we need to ensure that any new encrypted objects leverage the new key provider. Select the new provider and click Set as Default. You will be prompted to confirm:
Next we need to migrate all existing objects to the new key provider.
I previously wrote how you can accomplish this using PowerCLI. You would have to combine techniques from connecting to multiple key providers with rekeying all objects, by adding the key provider parameter to each command. After importing the VMEncryption and VsanEncryption modules and connecting to vCenter, this would look something like the following.
# Rekey host keys used for core dumps
# In almost all cases hosts in the same cluster are protected by the same provider and key,
# but this process ensures they are protected by the new key provider
# It is assumed here that all hosts are already in clusters enabled for encryption.
# Beware: If not, this command will initialize hosts and clusters for encryption.
foreach($myhost in Get-VMHost) {
  echo $myhost.name
  Set-VMHostCryptoKey -VMHost $myhost -KMSClusterId new-key-provider
}

# Display host key providers to verify result
Get-VMhost | Select Name,KMSserver

# Rekey a vSAN cluster
# It is assumed here that the cluster is already enabled for encryption.
# Beware: If not, this command will enable encryption for an unencrypted cluster.
Set-VsanEncryptionKms -Cluster cluster1 -KMSCluster new-key-provider

# Display cluster key provider to verify result
Get-VsanEncryptionKms -Cluster cluster1

# Rekey all encrypted virtual machines
# Each rekey operation starts a task which may take a brief time to complete for each encrypted VM
# Note that this will fail for any virtual machine that has snapshots; you must remove snapshots first
foreach($myvm in Get-VM) {
  if($myvm.KMSserver){
    echo $myvm.name
    Set-VMEncryptionKey -VM $myvm -KMSClusterId new-key-provider
  }
}

# Display all virtual machines' key providers (some are unencrypted) to verify result
Get-VM | Select Name,KMSserver
Note: currently the Set-VsanEncryptionKms function does not appear to work with vCenter 8. Until my bug report is fixed, you will have to use the vCenter UI for the vSAN step. For your cluster, go to Configuration | vSAN | Services. Under Data Services, click Edit. Choose the new key provider and click Apply:
Unfortunately, it is not possible to make all of these changes in the vCenter UI. You can rekey an individual VM against the new key provider, and as we’ve done above, you can rekey your vSAN cluster against the new key provider. And if you have vSAN encryption enabled, reconfiguring vSAN will also rekey your cluster encryption against the new key provider. But if you are not using vSAN, or if you do not have vSAN encryption enabled, I don’t know of a way to rekey your hosts against the new provider in the UI. (In fact, the cluster configuration UI is somewhat misleading as it indicates you have a choice of key provider, and you can even select the new key provider. But this will only influence the creation of new VMs; it will not rekey the hosts against the new provider.) As a result, you should use PowerCLI to rekey your hosts, and I recommend using it for your VMs as well.
After you have rekeyed all objects, you can remove the original key provider from vCenter:
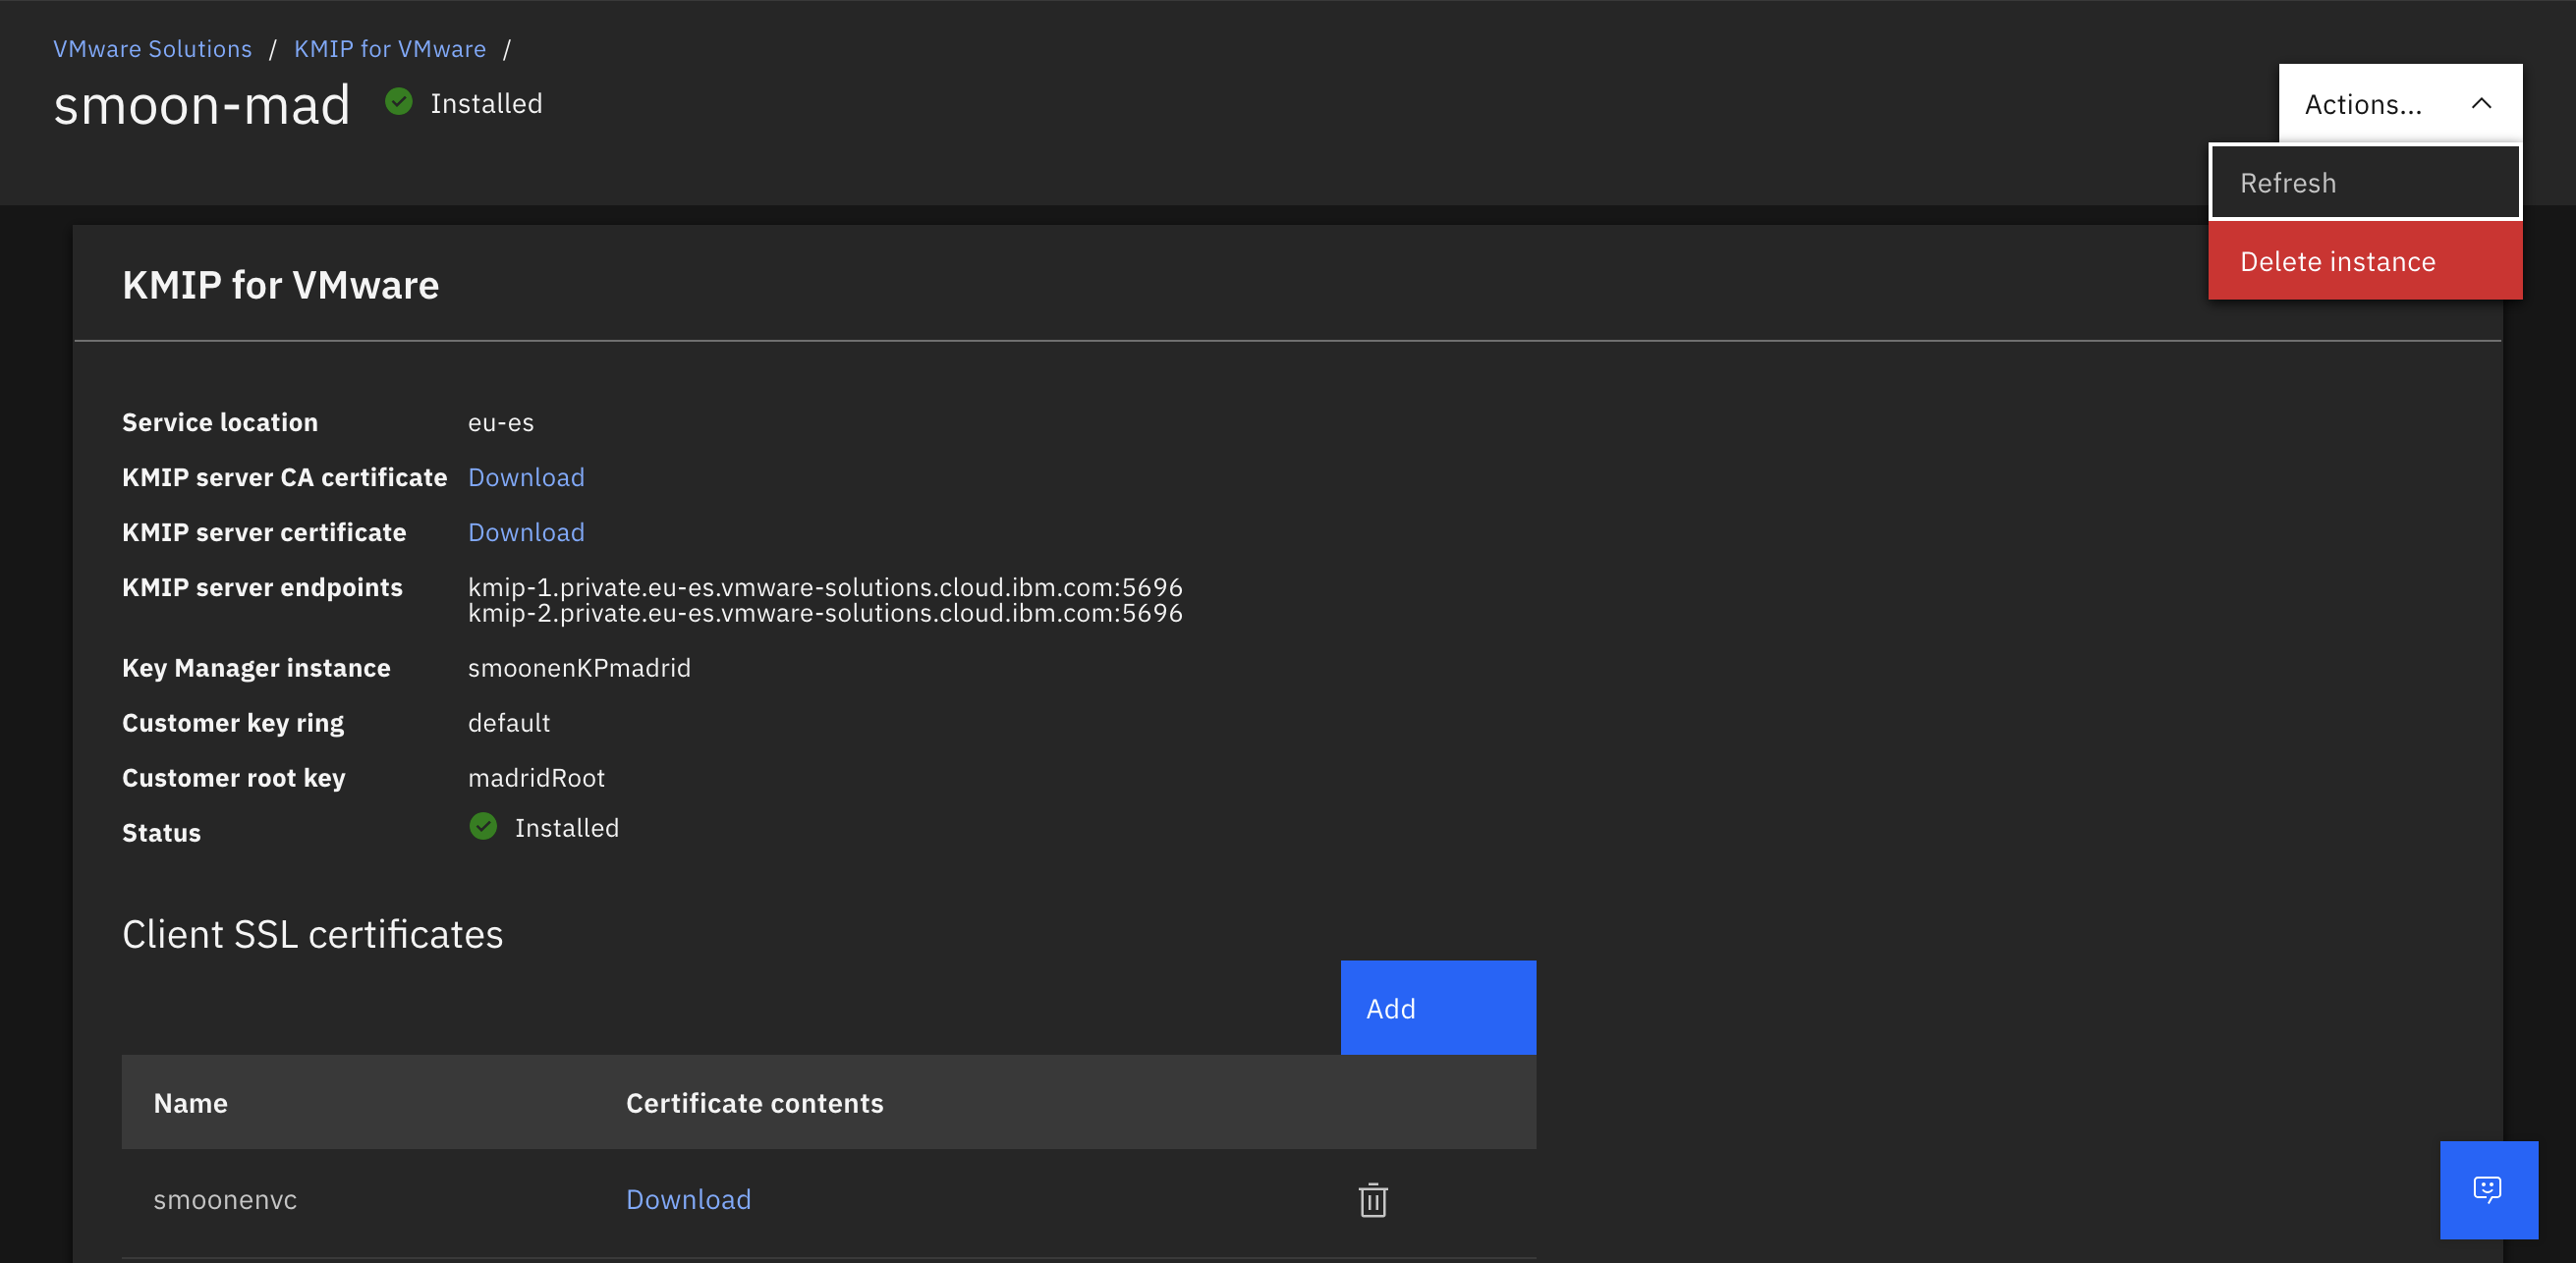
Now you can delete your KMIP for VMware resource from the cloud UI:
For completeness, you should also delete all of the original keys created by the KMIP for VMware adapter. Recall that VMware leaks keys; if you have many keys to delete, you may wish to use the Key Protect CLI to remove them. You can identify these keys by name; they will have a vmware_kmip prefix:
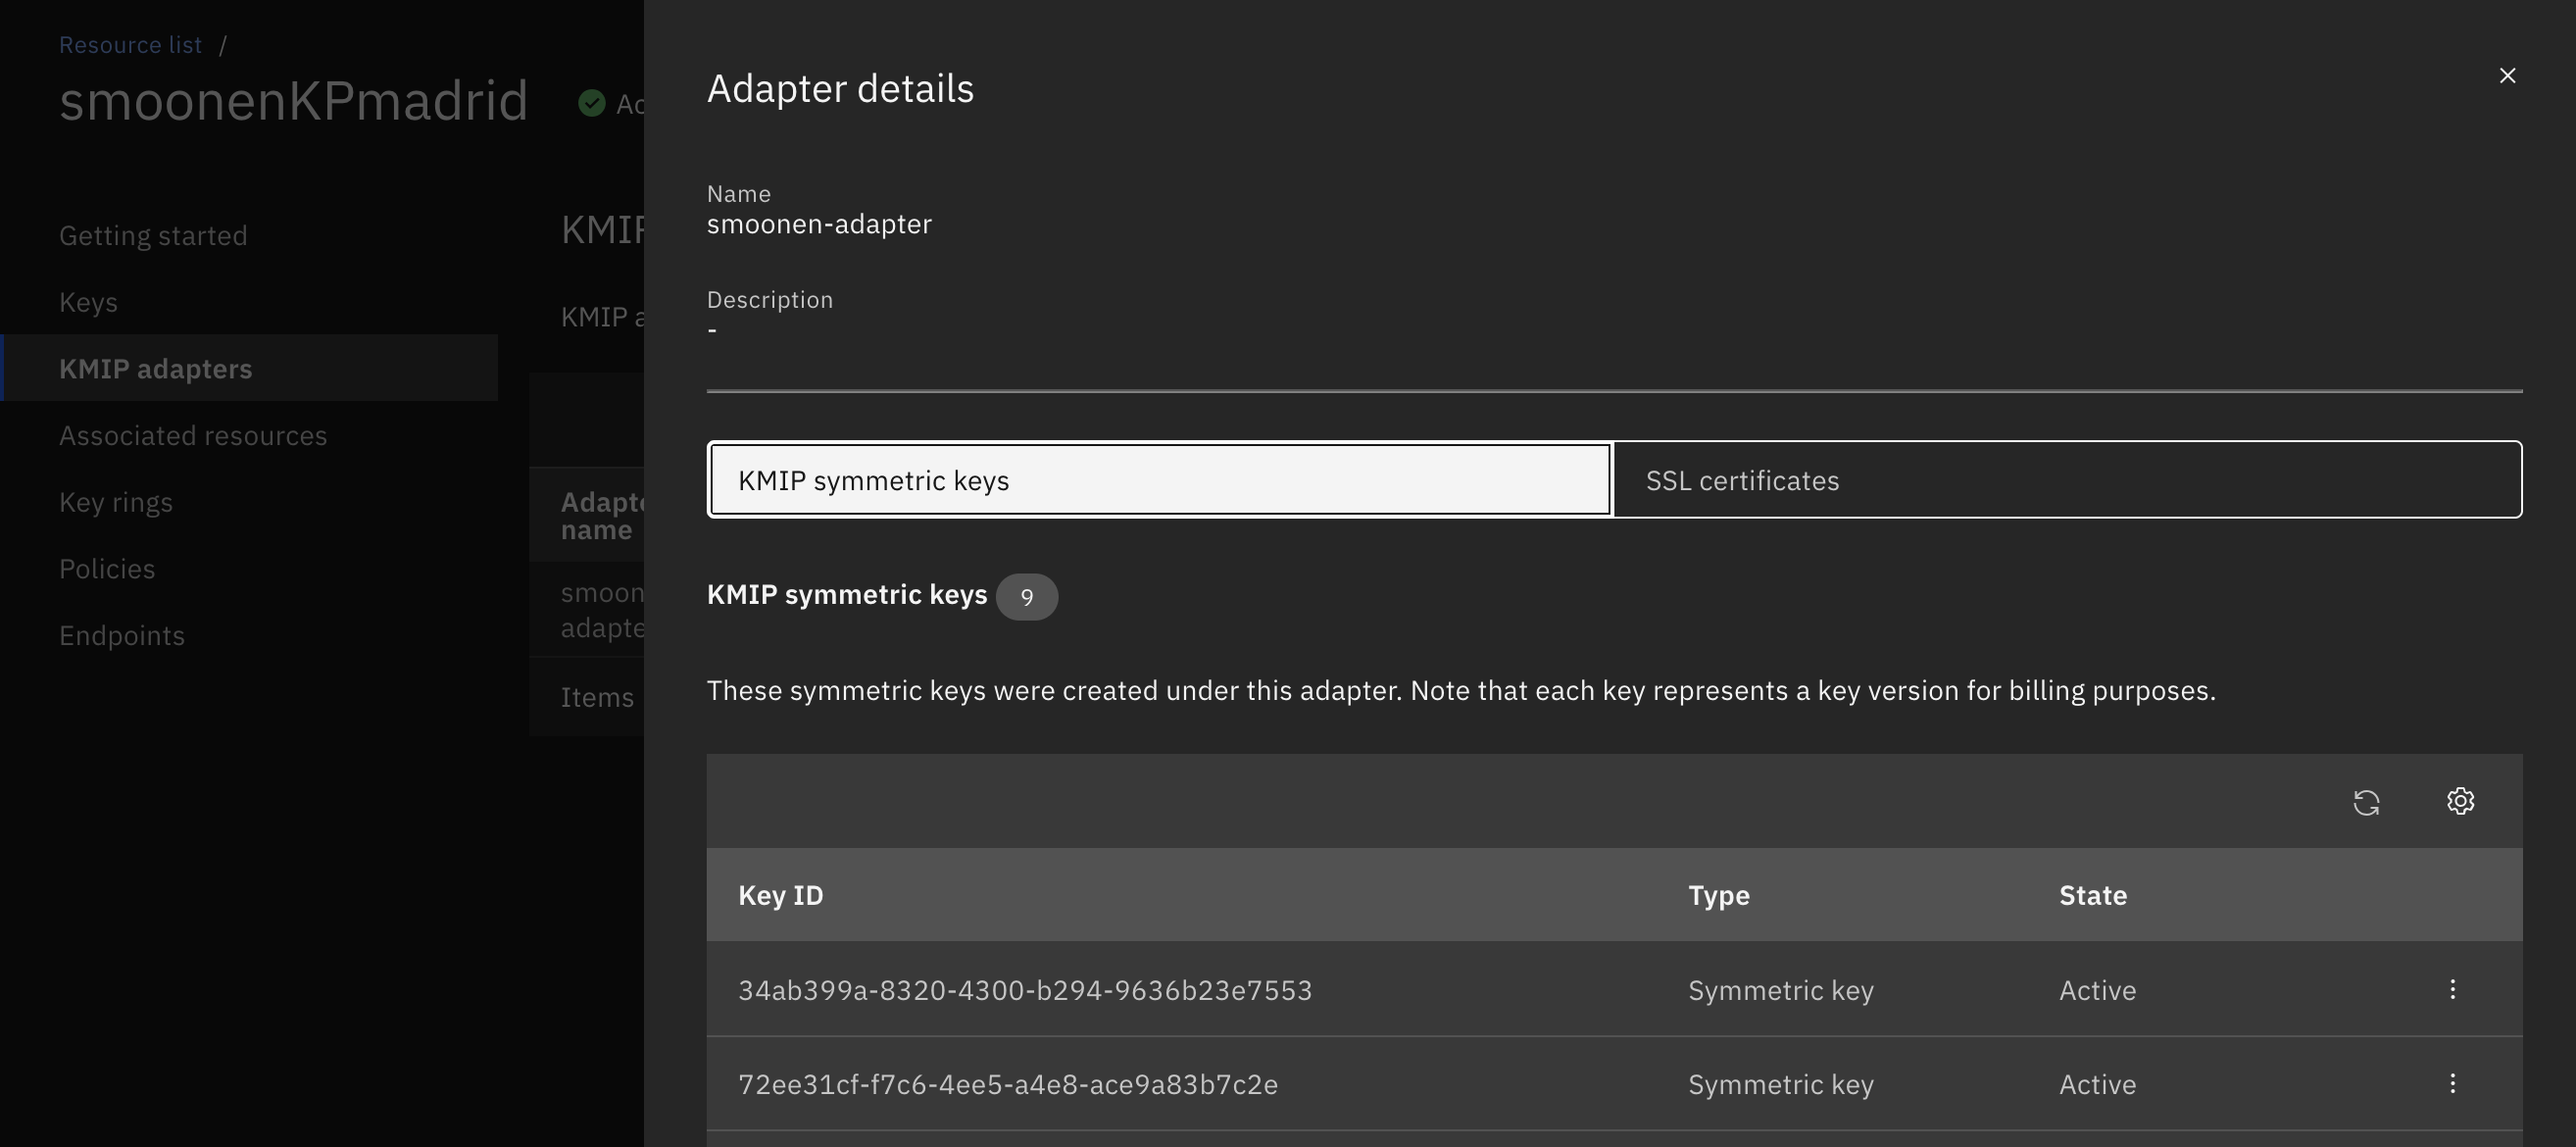
You may notice that there are no standard keys representing the KMIP keys created by the new native adapter. Instead, its keys are visible within the KMIP symmetric keys tab of your KMIP adapter:
If instead you are using VMware Avi Load Balancer in front of your Director cells, I want to highlight a recommended DataScript that you can use to accomplish the same result. My colleague Fahad Ladhani posted this in the comments of Tomas Fojta’s blog, but I’m highlighting it here for greater awareness:
-- HTTP_REQUEST
-- get cookies
cookies, count = avi.http.get_cookie_names()
avi.vs.log("cookies_count_before=" .. count)
-- if cookie(s) exists, validate cookie(s) name
if count >= 1 then
  for cookie_num= 1, #cookies do
    -- only keep cookies: JSESSIONID, rstd, vcloud_session_id, vcloud_jwt, sso-preferred, sso_redirect_org, xxxxx.redirectTo and xxxxx.state
    cookie_name = cookies[cookie_num]
    if cookie_name == "JSESSIONID" or  cookie_name == "rstd" or cookie_name == "vcloud_session_id" or cookie_name == "vcloud_jwt" or cookie_name == "sso-preferred" or cookie_name == "sso_redirect_org" then
      avi.vs.log("keep_cookie=" .. cookie_name)
    elseif string.endswith(cookie_name, ".redirectTo") or string.endswith(cookie_name, ".state") then
      avi.vs.log("keep_cookie=" .. cookie_name)
    else
      -- avi.vs.log("delete_cookie=" .. cookie_name)  -- not logging this because log gets truncated
      avi.http.remove_cookie(cookie_name)
    end
  end
end
-- get cookies
cookies, count = avi.http.get_cookie_names()
avi.vs.log("cookies_count_after=" .. count)
Tomas Fojta wrote previously about issues with Cloud Director errors having to do with excessively large cookies. This is a common problem for cloud providers where there may be multiple web applications, some of which fail to properly limit their cookie scope. At the moment I am writing this, my browser is sending about 6.7kB of cookie data when visiting cloud.ibm.com. This is close to the limit supported by Cloud Director, and sometimes it goes over that limit.
Tomas suggested an approach using the NSX load balancer haproxy configuration to filter cookies. Unfortunately, Tomas’s approach does not cover all possible cases. For example, it does not cover the case where only one of these two cookies is present, and it does not cover the case where there are additional cookies in the header after these two cookies. Furthermore, there are additional cookies used by Cloud Director; at a minimum this includes the following:
JSESSIONID
rstd
vcloud_session_id
vcloud_jwt
sso-preferred
sso_redirect_org
*.redirectTo
*.state
If you have a known limited list of cookies (or cookie name patterns) like this that you want to pass to your application, it is relatively easy to program a positive cookie filter with an advanced load balancer such as VMware Avi Load Balancer. But if you are using the NSX embedded load balancer and are limited to the haproxy approach of using reqirep with regular expressions, it is an intractable problem. Therefore, instead of using reqirep to selectively include the cookies that Director needs, I recommend the approach of using reqirep to selectively and iteratively delete cookies that you know are likely to be large and to overflow Director’s supported limit. It may take some iterative experimentation over a period of time for you to identify all of the offending cookies.
For example, we can use the following four rules to remove two of the larger cookies for cloud.ibm.com, neither of which are needed by Director. For each cookie I am removing, I have written a pair of rules: the first rule removes the cookie if it appears anywhere other than the end of the cookie list, and the second removes it if it is at the end of the list:
When you connect to a key provider, vCenter only offers you the option of trusting the provider’s end-entity certificate:
Typically an end-entity certificate has a lifetime of a year or less. This means that you will be revisiting the provider configuration to verify the certificate on at least an annual basis.
However, after you have trusted this certificate, vCenter gives you the option of configuring an alternate certificate to be trusted. You can use this to establish trust with one of your key provider’s CA certificates instead of the end-entity certificate. Typically these have longer lifetimes, so your key provider connectivity will be interrupted much less frequently.
You may have to work with your security admin to obtain the CA certificate, or depending on how your key provider is configured you may be able to obtain the certificate directly from the KMIP connection using a tool like openssl:
root@smoonen-vc [ ~ ]# openssl s_client -connect private.eu-de.kms.cloud.ibm.com:5696 -showcerts
CONNECTED(00000003)
depth=2 C = US, O = DigiCert Inc, OU = www.digicert.com, CN = DigiCert Global Root G2
verify return:1
depth=1 C = US, O = DigiCert Inc, CN = DigiCert Global G2 TLS RSA SHA256 2020 CA1
verify return:1
depth=0 C = US, ST = New York, L = Armonk, O = International Business Machines Corporation, CN = private.eu-de.kms.cloud.ibm.com
verify return:1
---
Certificate chain
 0 s:C = US, ST = New York, L = Armonk, O = International Business Machines Corporation, CN = private.eu-de.kms.cloud.ibm.com
   i:C = US, O = DigiCert Inc, CN = DigiCert Global G2 TLS RSA SHA256 2020 CA1
   a:PKEY: rsaEncryption, 2048 (bit); sigalg: RSA-SHA256
   v:NotBefore: Jun 18 00:00:00 2024 GMT; NotAfter: Jun 17 23:59:59 2025 GMT
-----BEGIN CERTIFICATE-----
MIIHWDCCBkCgAwIBAgIQCK1qBW4aHA51Yl6cJVq96TANBgkqhkiG9w0BAQsFADBZ
. . .
You can then paste this certificate directly into the vCenter UI:
After doing this, vCenter will still display the lifetime validity of the end-entity certificate, rather than the CA certificate. But it will now be trusting the CA certificate, and so this trust will extend to the next version of the end-entity certificate, as long as it is signed by the same CA.