The IBM Cloud Key Protect key management offering has introduced a native KMIP provider to replace the existing “KMIP for VMware” KMIP provider. This new native provider has the advantage of:
- Improved performance because KMIP-to-key-provider calls are closer in network distance and no longer cross service-to-service authorization boundaries.
- Improved visibility and management for the KMIP keys.
You can find documentation here: Using the key management interoperability protocol (KMIP)
IBM Cloud’s Hyper Protect Cryptographic Services (HPCS) offering is exploring the possibility of supporting native KMIP providers as well. Stay tuned if you are a user of HPCS.
If you already use the KMIP for VMware provider with Key Protect, you should switch to the new native provider for improved performance. Here’s how you can migrate to the new provider.
First, navigate to your Key Protect instance:
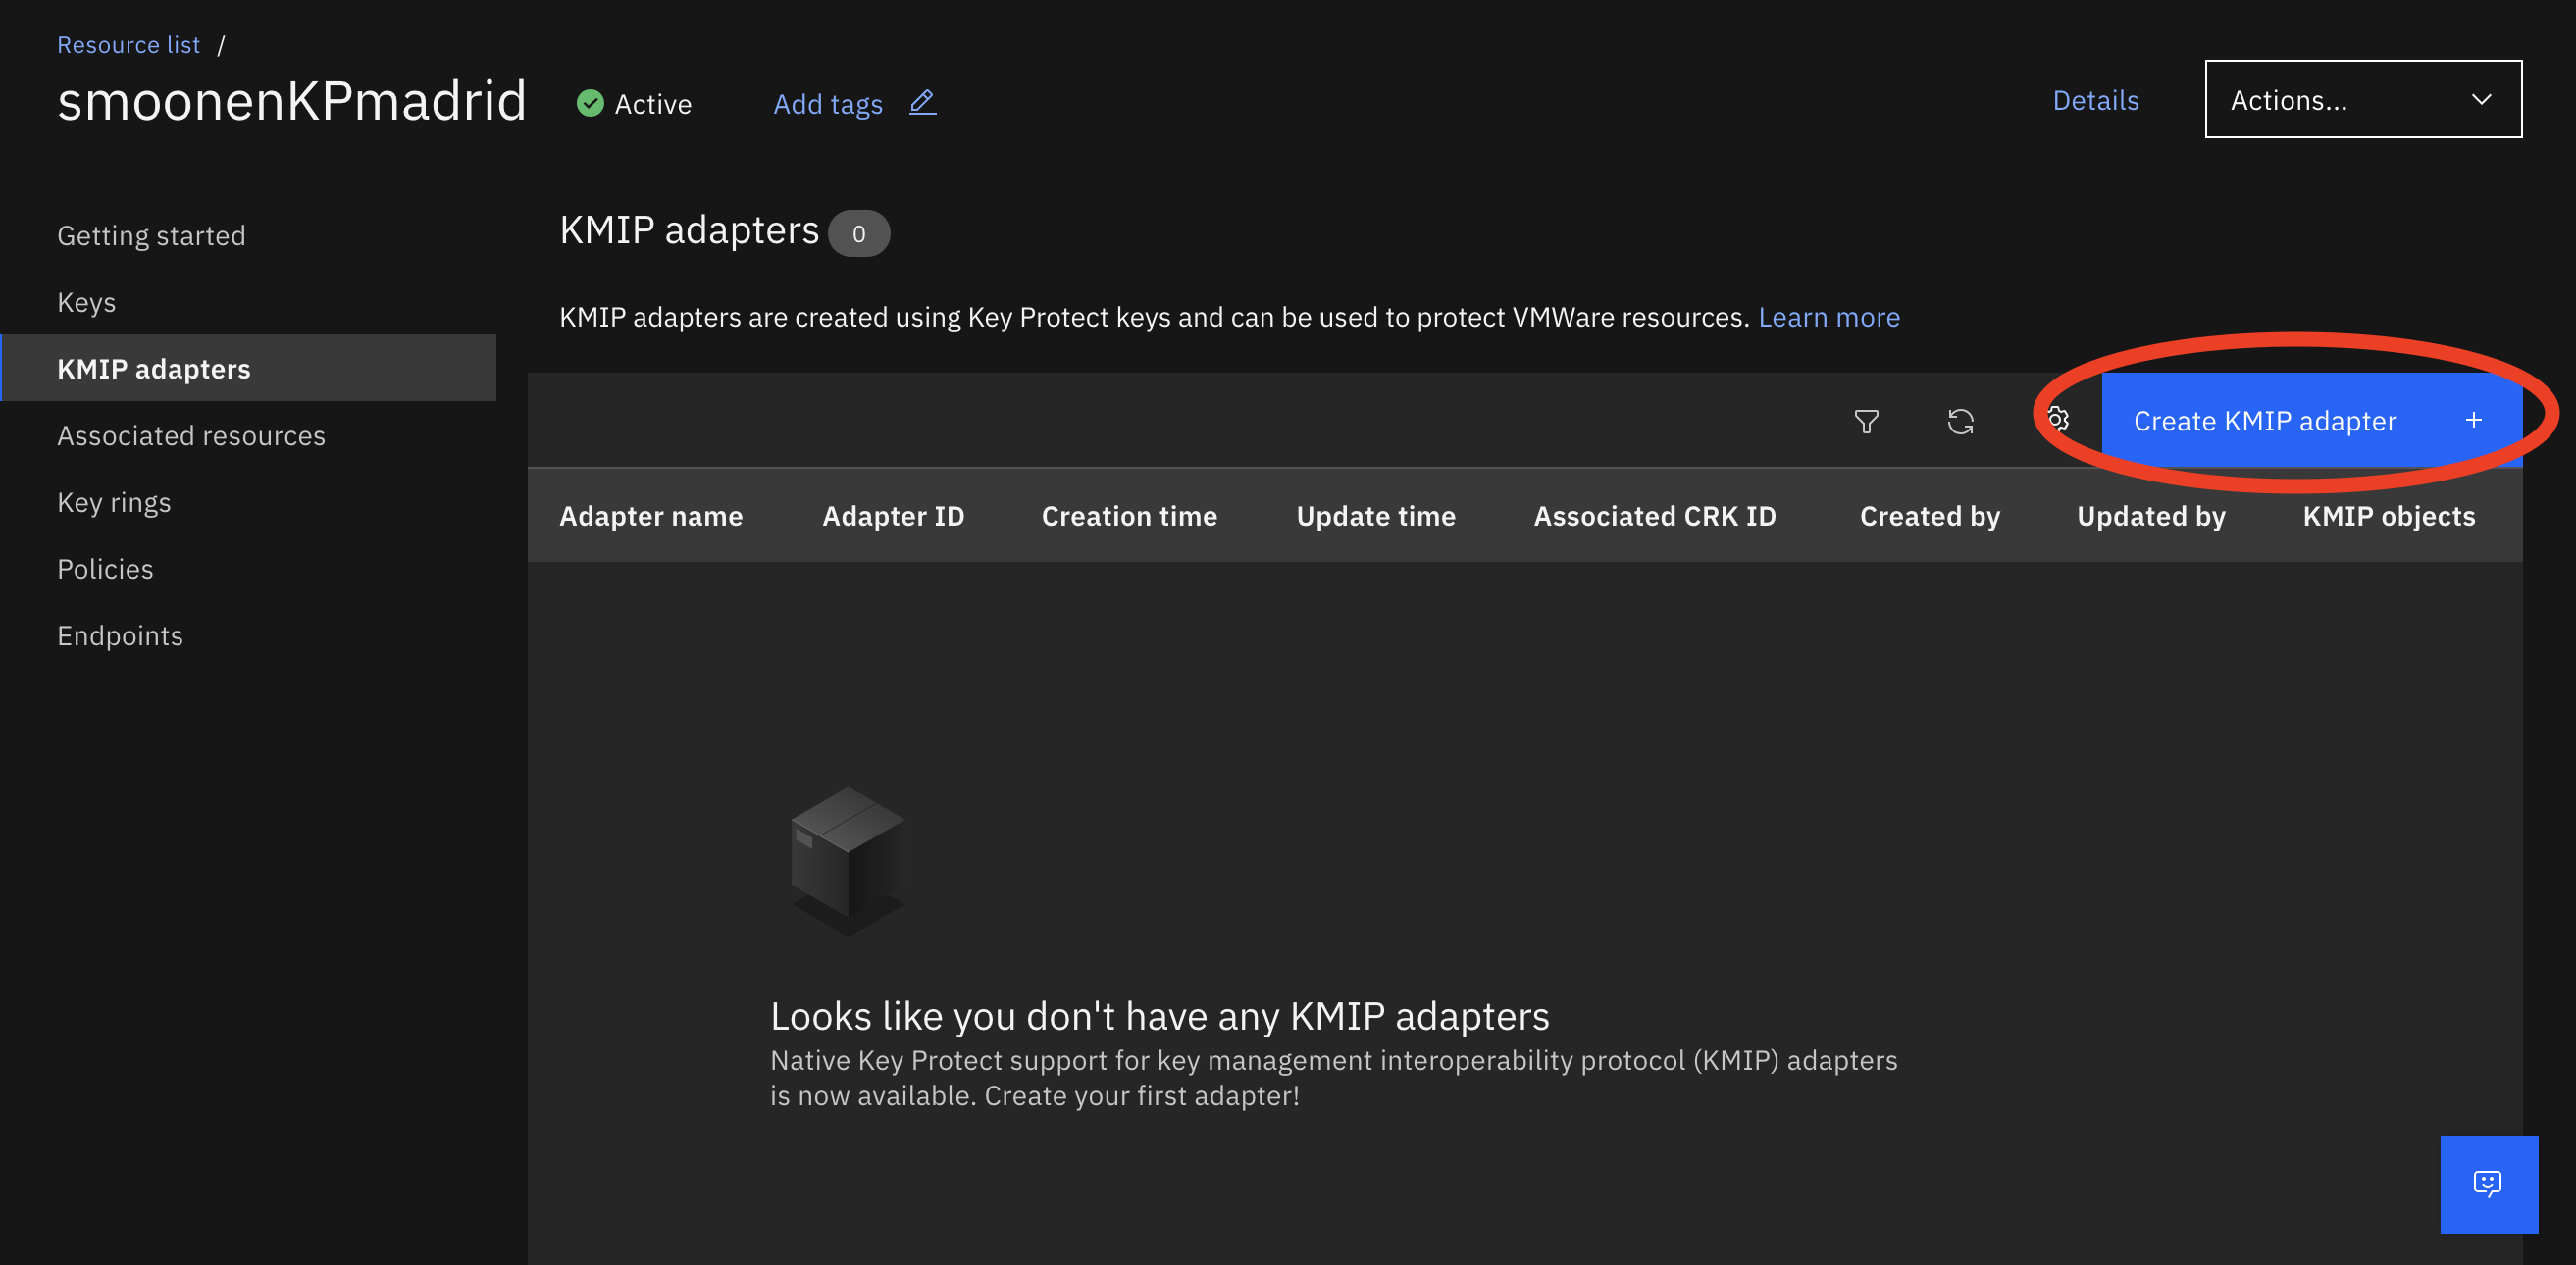
Create a KMIP adapter:

You don’t need to upload a vCenter certificate immediately; in fact, remember that vCenter generates a new certificate with each connection attempt.
Click the Endpoints tab to identify the KMIP endpoint you need to configure in vCenter:
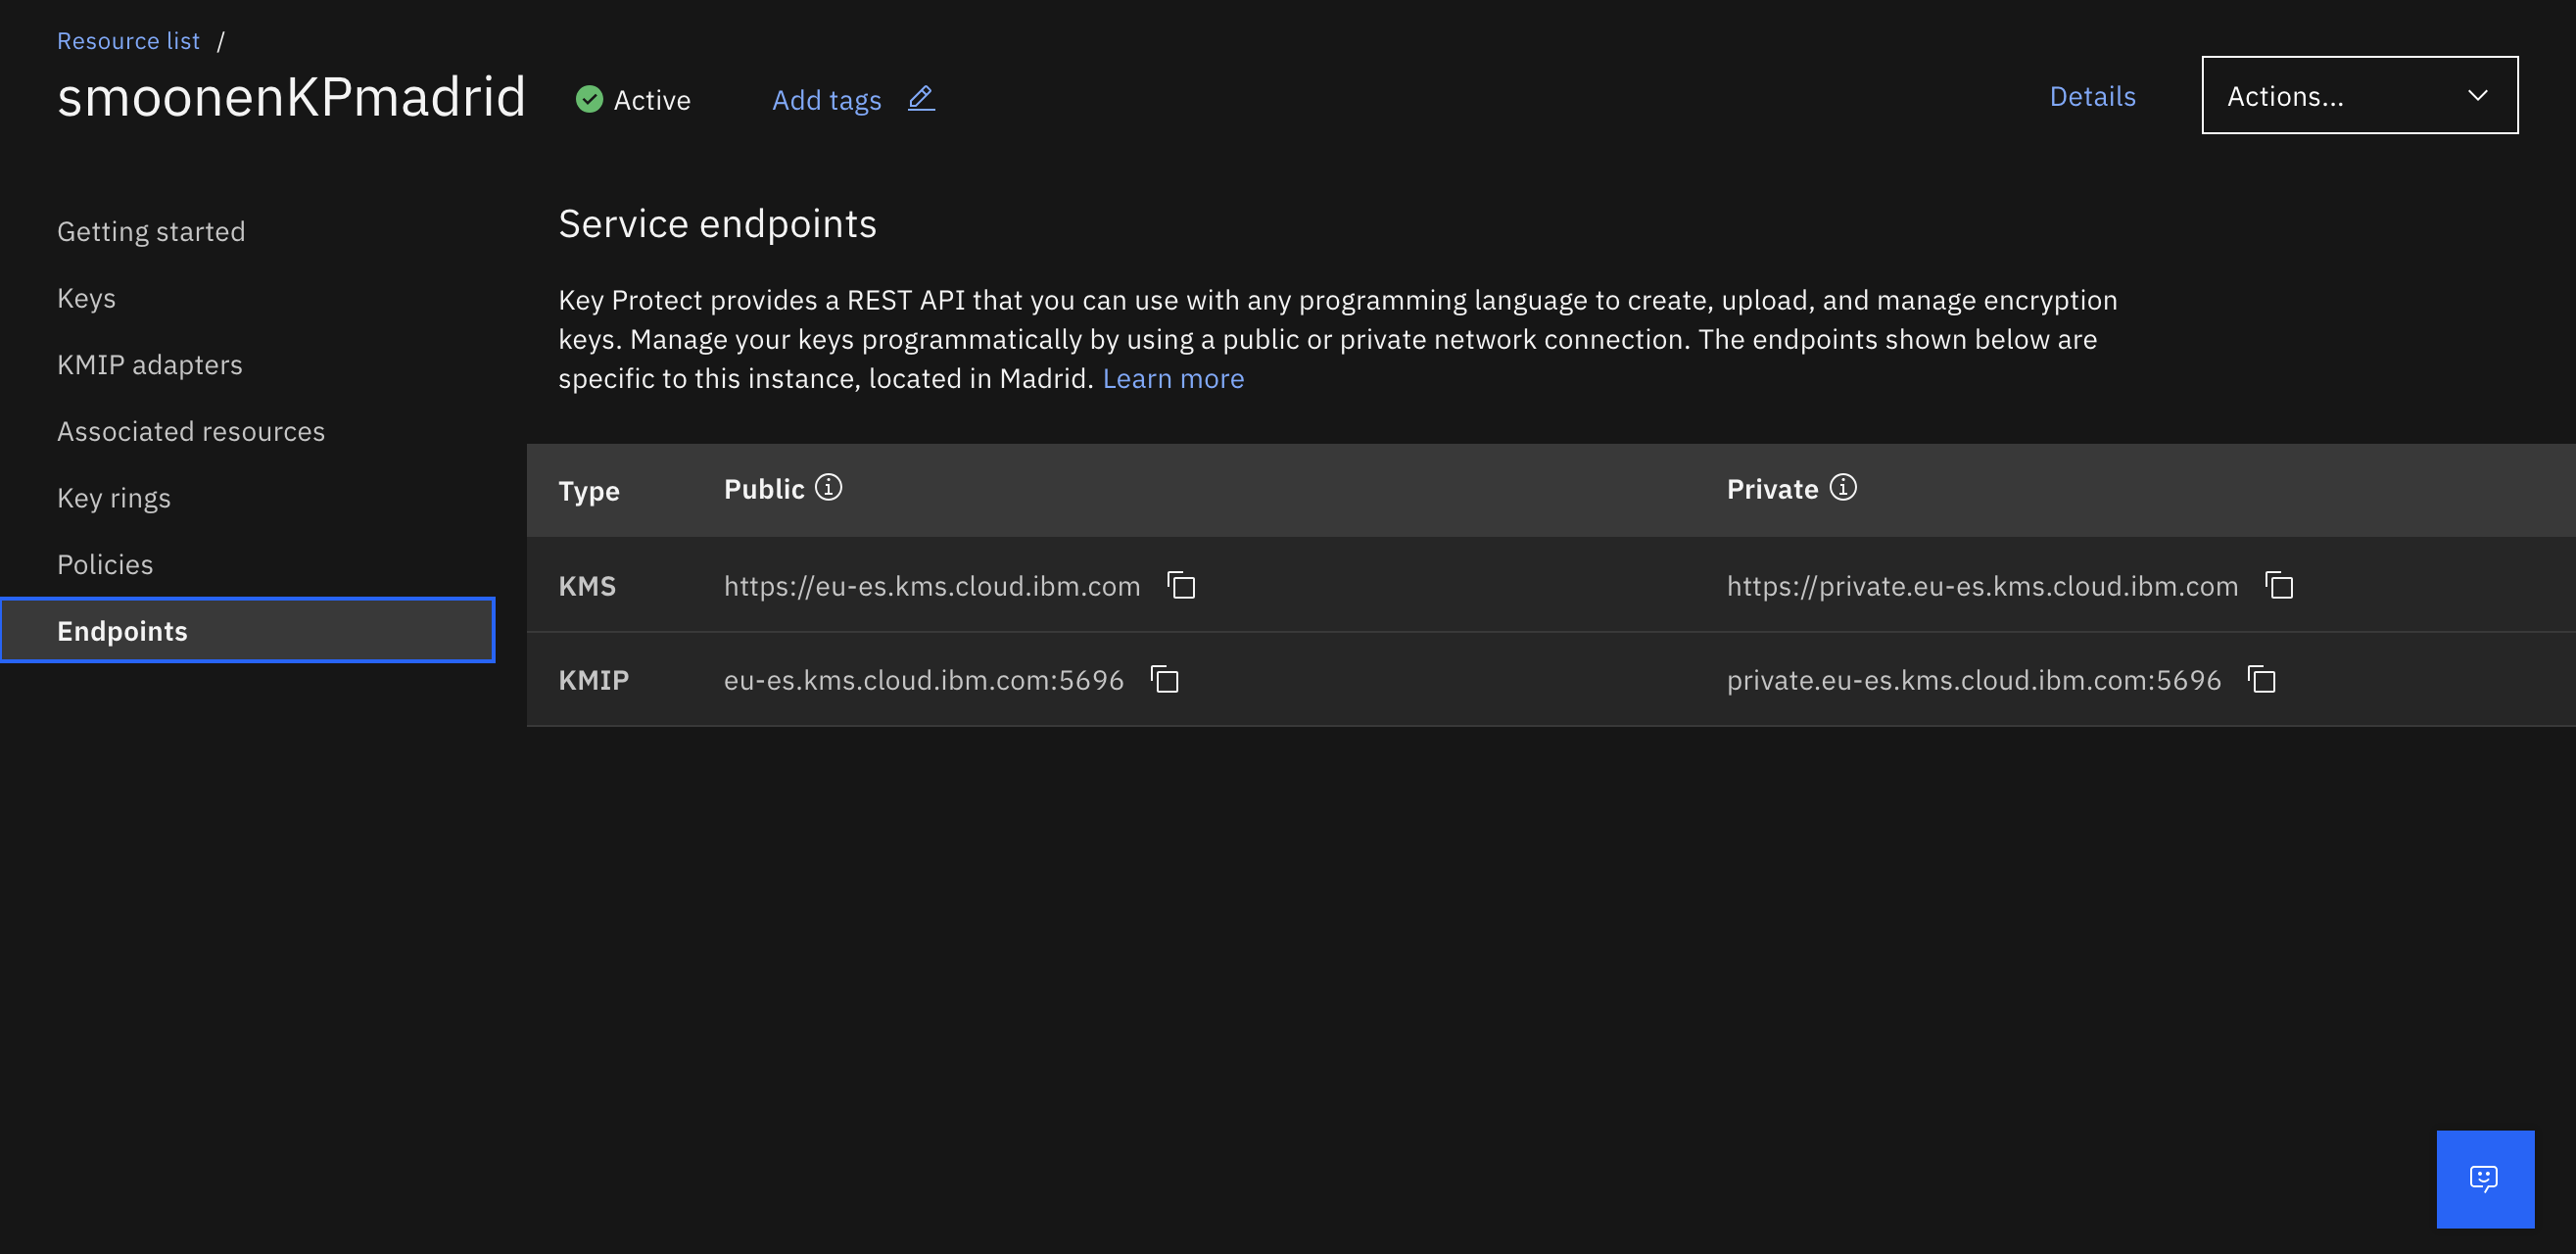
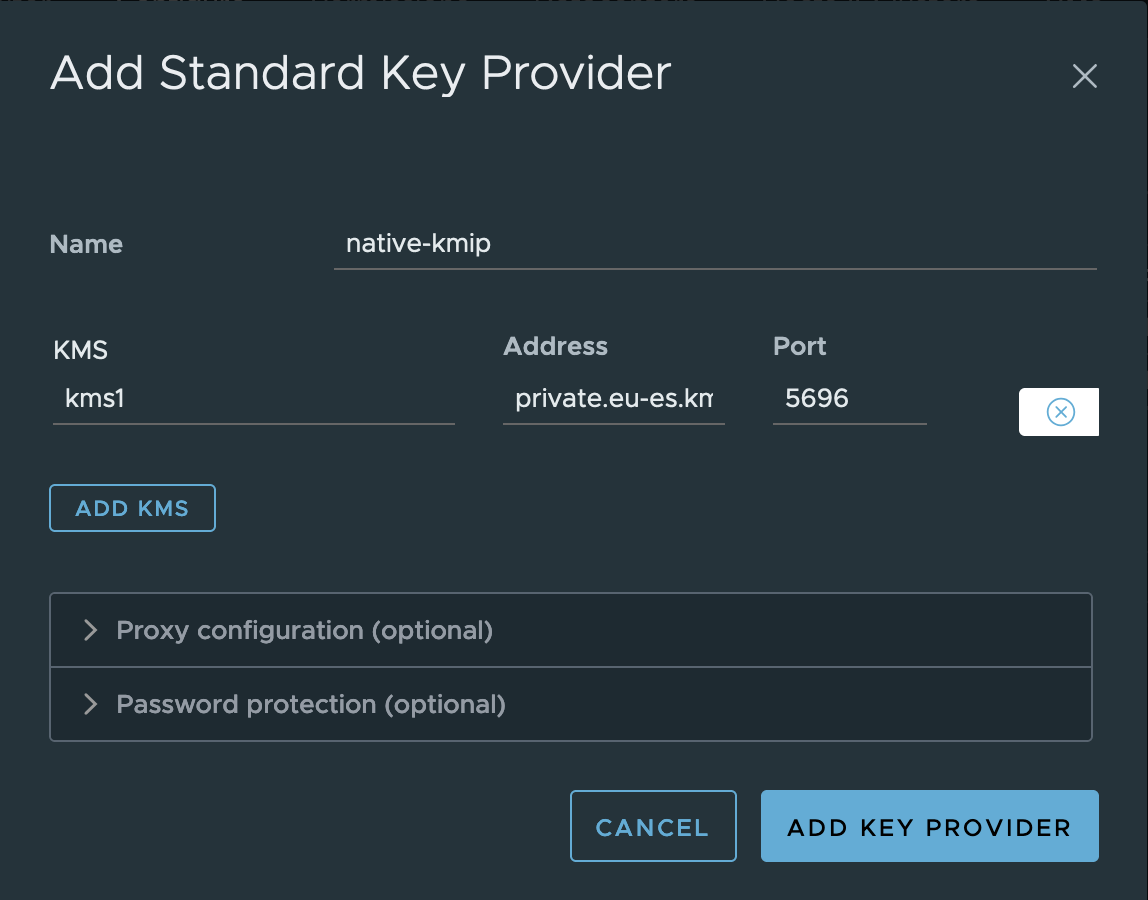
Note that, unlike the KMIP for VMware offering, there is only one endpoint. This single hostname is load balanced and is highly available in each region. Now go to vCenter, select the vCenter object, select Configure | Key Providers, then add a standard key provider:
Examine and trust the certificate:

Now select the new key provider, and select the single server in the provider. Click Establish Trust | Make KMS trust vCenter. I prefer to use the vCenter Certificate option which will generate a new certificate just for this connection.
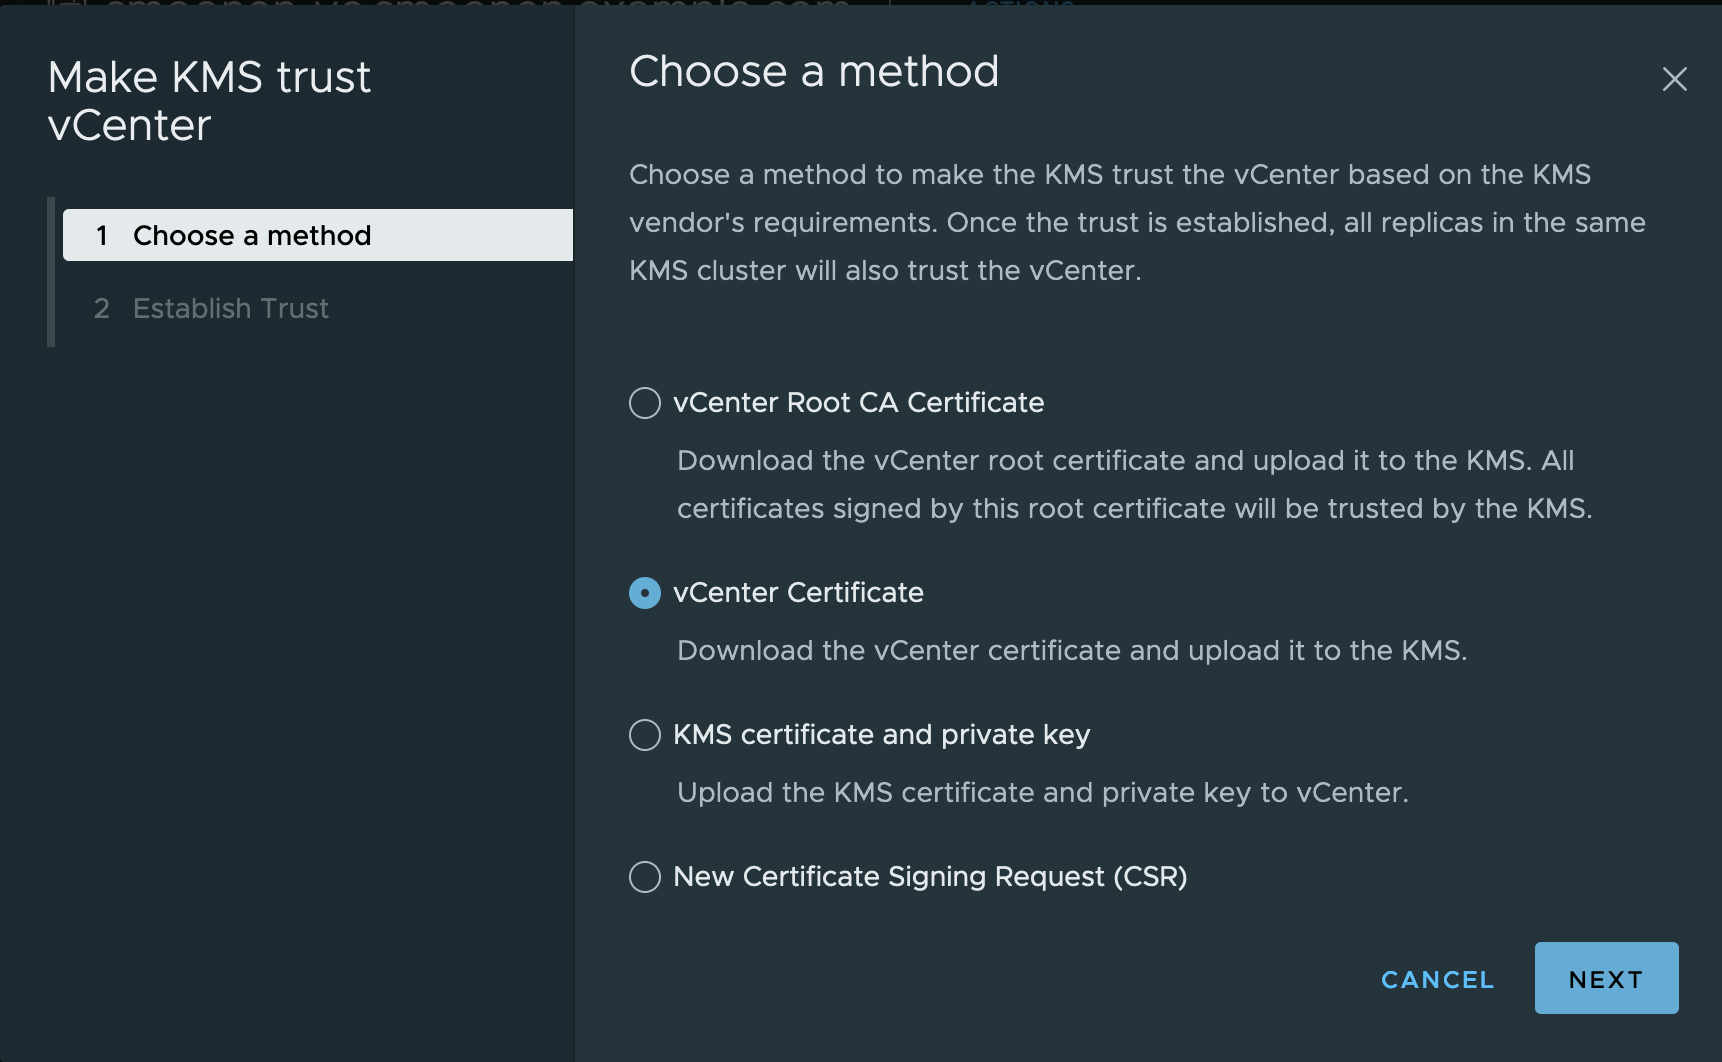
Remember to wait a few seconds before copying the certificate because it may change. Then copy the certificate and click Done:
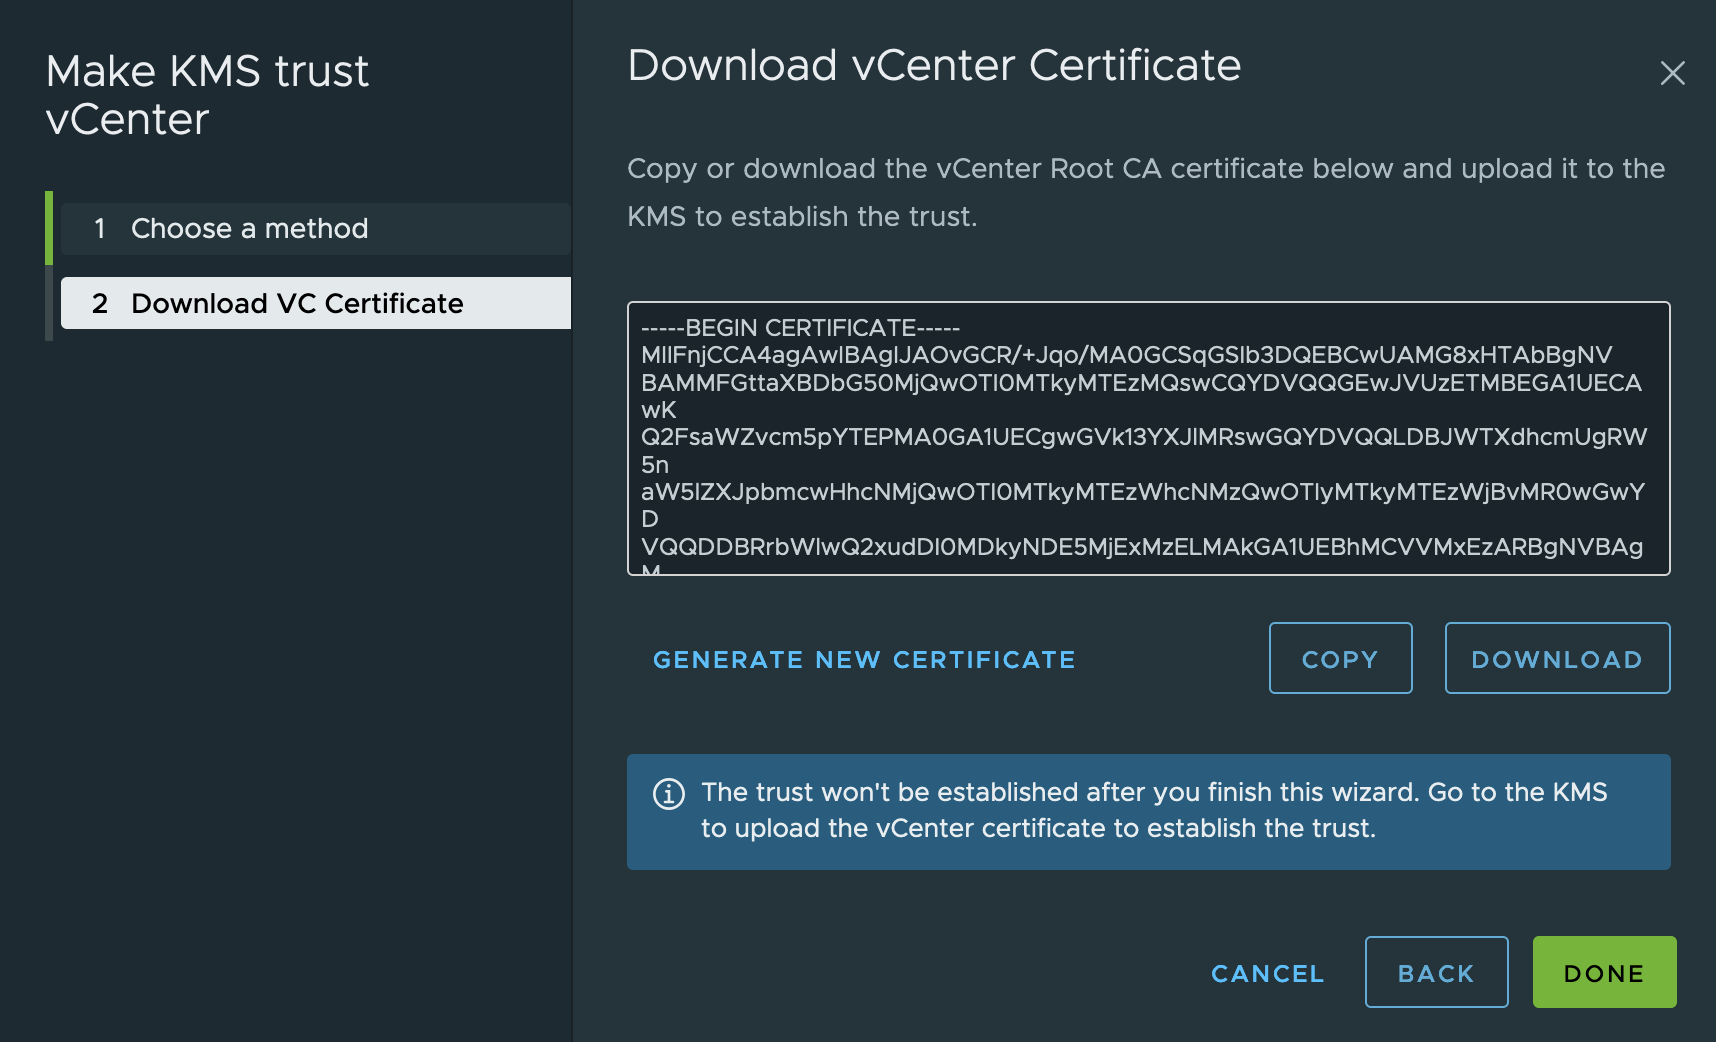
Importantly, at this step you need to follow my instructions to reconfigure vCenter to trust the KMIP CA certificate instead of the end-entity certificate. You should do this for two reasons: first, you won’t have to re-trust the certificate every time it is rotated. More importantly, in some cases the native KMIP provider serves alternate certificates on the private connection, and this can confuse vSAN encryption. (The alternate certificates both includes the private hostname among their alternate names, so they are valid. The underlying reason for this difference is because VMware is in the process of adding SNI support to their KMIP connections, and the server behavior differs depending on whether the client sends SNI.) Trusting the CA certificate ensures that the connection is trusted even if the alternate certificate is served on the connection.
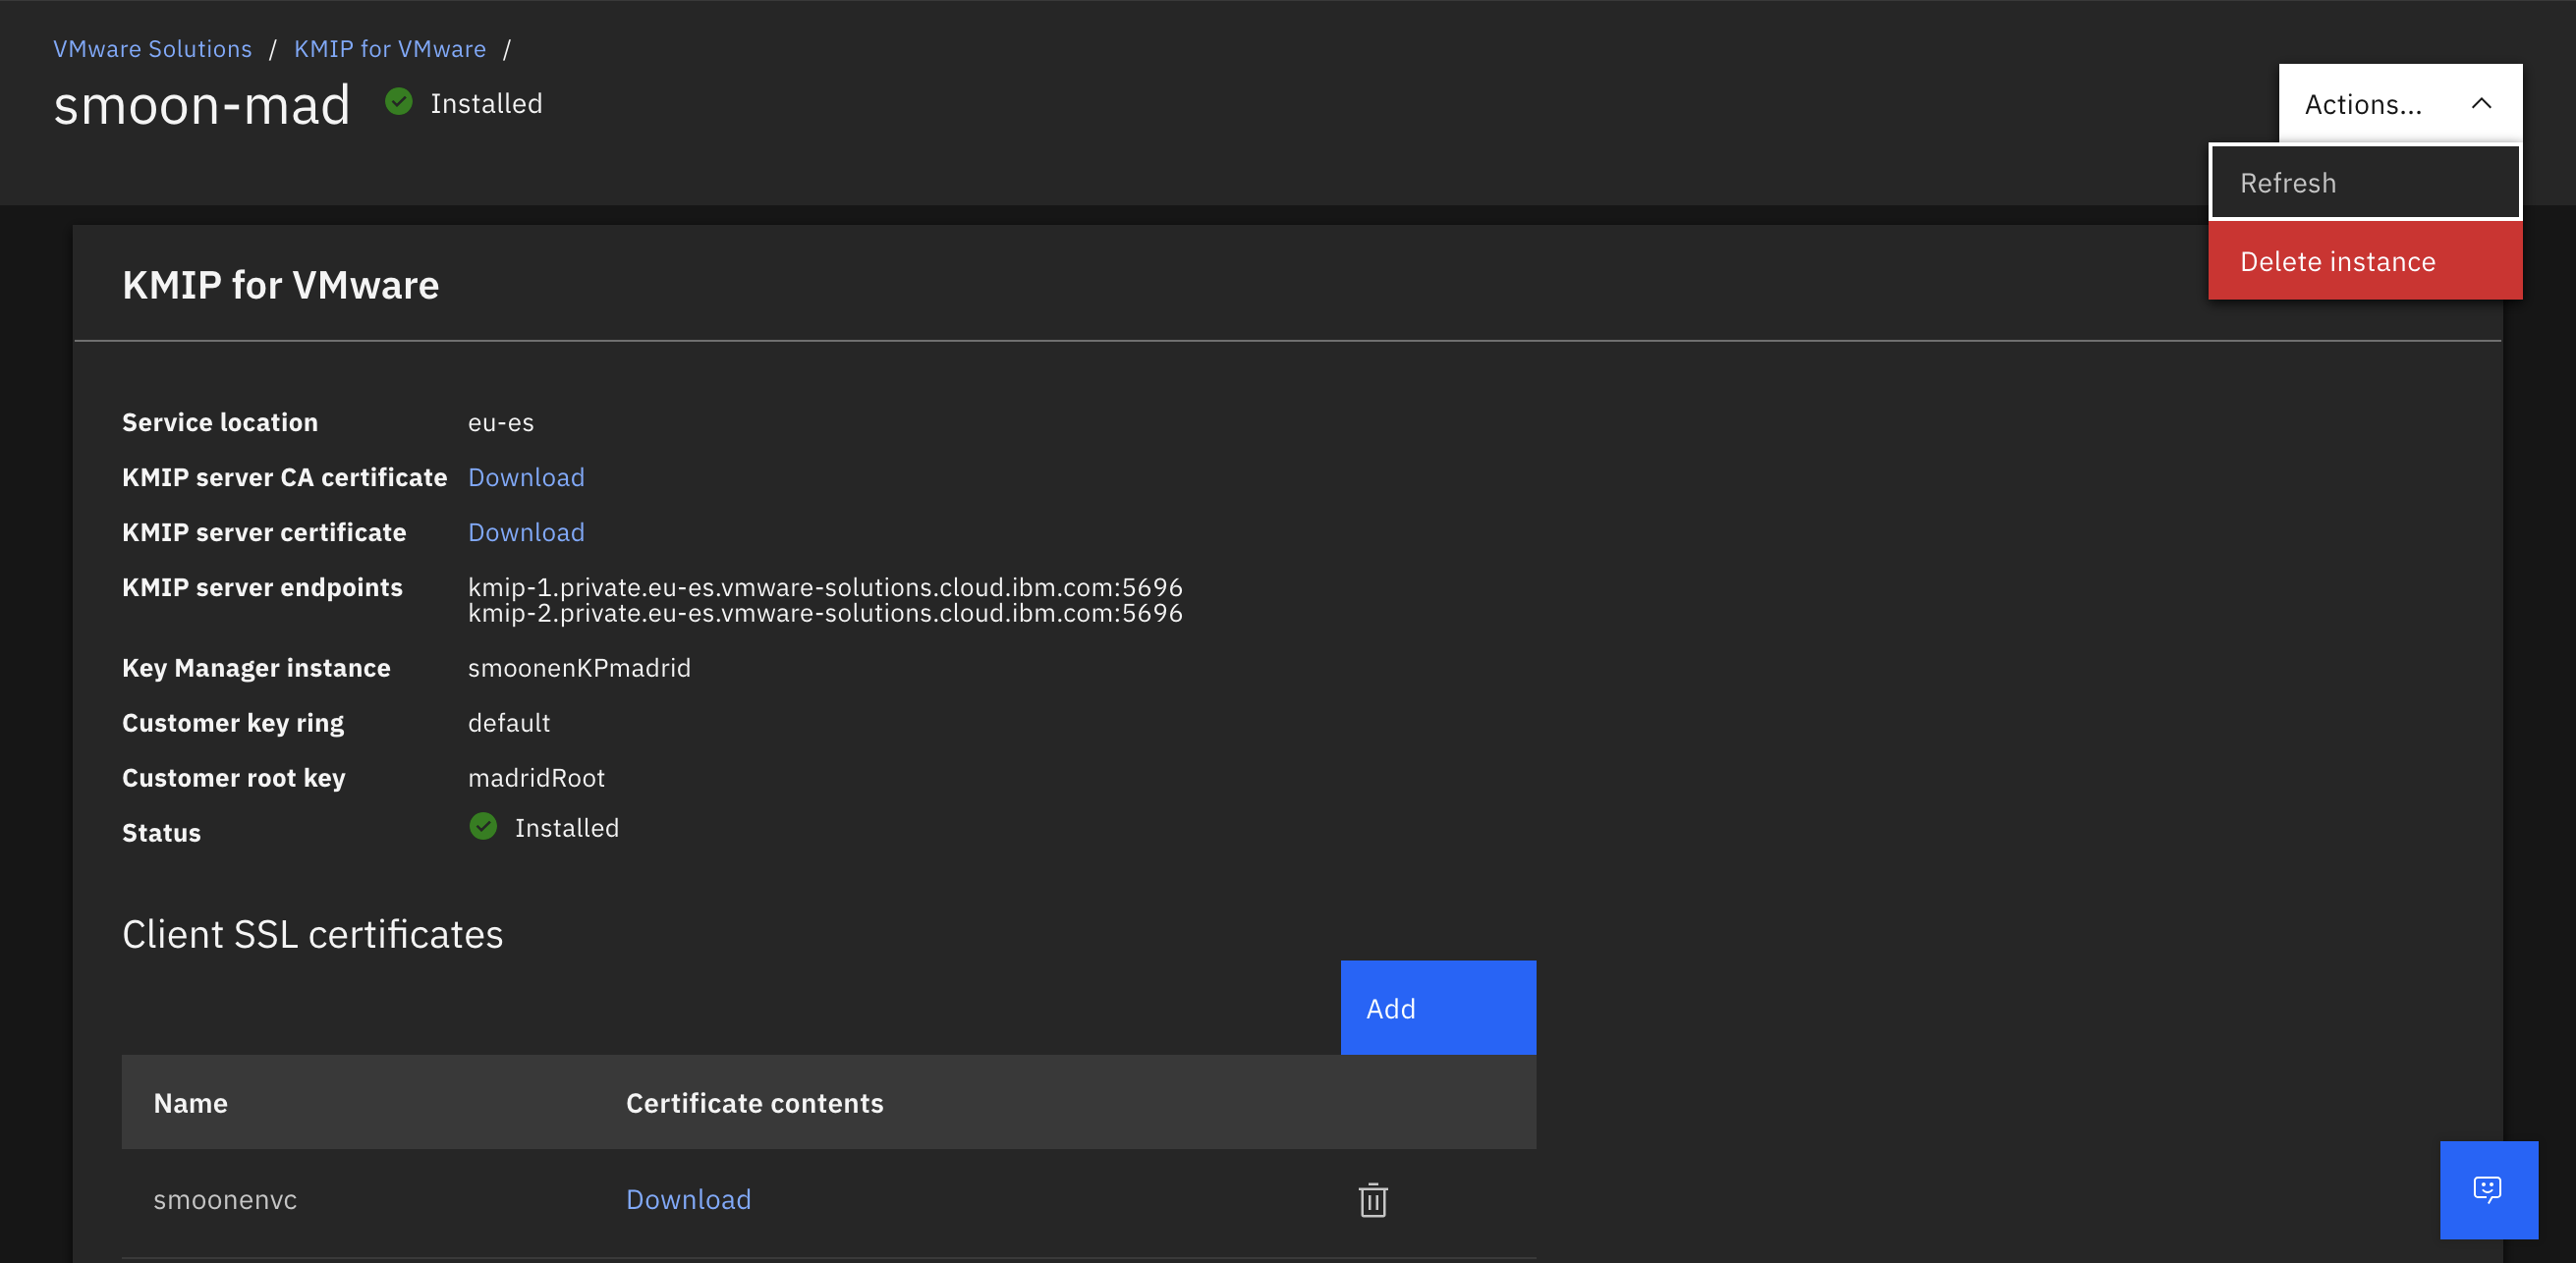
Then return to the IBM Cloud and view the details of your KMIP adapter:

Select the SSL certificates tab and click Add certificate:

Paste in the certificate you copied from vCenter:

Back in vCenter, it may take several minutes before the key provider status changes to healthy:

First we need to ensure that any new encrypted objects leverage the new key provider. Select the new provider and click Set as Default. You will be prompted to confirm:

Next we need to migrate all existing objects to the new key provider.
I previously wrote how you can accomplish this using PowerCLI. You would have to combine techniques from connecting to multiple key providers with rekeying all objects, by adding the key provider parameter to each command. After importing the VMEncryption and VsanEncryption modules and connecting to vCenter, this would look something like the following.
WARNING: Since first publishing this, I have learned that in some configurations, vSphere HA may reboot a virtual machine that is encrypted with vSphere encryption and which is being rekeyed. Please read that linked post for information on how you can workaround this problem.
# Rekey host keys used for core dumps
# In almost all cases hosts in the same cluster are protected by the same provider and key,
# but this process ensures they are protected by the new key provider
# It is assumed here that all hosts are already in clusters enabled for encryption.
# Beware: If not, this command will initialize hosts and clusters for encryption.
foreach($myhost in Get-VMHost) {
  echo $myhost.name
  Set-VMHostCryptoKey -VMHost $myhost -KMSClusterId new-key-provider
}

# Display host key providers to verify result
Get-VMhost | Select Name,KMSserver

# Rekey a vSAN cluster
# It is assumed here that the cluster is already enabled for encryption.
# Beware: If not, this command will enable encryption for an unencrypted cluster.
Set-VsanEncryptionKms -Cluster cluster1 -KMSCluster new-key-provider

# Display cluster key provider to verify result
Get-VsanEncryptionKms -Cluster cluster1

# Rekey all encrypted virtual machines
# Each rekey operation starts a task which may take a brief time to complete for each encrypted VM
# Note that this will fail for any virtual machine that has snapshots; you must remove snapshots first
foreach($myvm in Get-VM) {
  if($myvm.KMSserver){
    echo $myvm.name
    Set-VMEncryptionKey -VM $myvm -KMSClusterId new-key-provider
  }
}

# Display all virtual machines' key providers (some are unencrypted) to verify result
Get-VM | Select Name,KMSserver
Note: currently the Set-VsanEncryptionKms function does not appear to work with vCenter 8. Until my bug report is fixed, you will have to use the vCenter UI for the vSAN step. For your cluster, go to Configuration | vSAN | Services. Under Data Services, click Edit. Choose the new key provider and click Apply:

Unfortunately, it is not possible to make all of these changes in the vCenter UI. You can rekey an individual VM against the new key provider, and as we’ve done above, you can rekey your vSAN cluster against the new key provider. And if you have vSAN encryption enabled, reconfiguring vSAN will also rekey your cluster encryption against the new key provider. But if you are not using vSAN, or if you do not have vSAN encryption enabled, I don’t know of a way to rekey your hosts against the new provider in the UI. (In fact, the cluster configuration UI is somewhat misleading as it indicates you have a choice of key provider, and you can even select the new key provider. But this will only influence the creation of new VMs; it will not rekey the hosts against the new provider.) As a result, you should use PowerCLI to rekey your hosts, and I recommend using it for your VMs as well.
After you have rekeyed all objects, you can remove the original key provider from vCenter:

Now you can delete your KMIP for VMware resource from the cloud UI:
For completeness, you should also delete all of the original keys created by the KMIP for VMware adapter. Recall that VMware leaks keys; if you have many keys to delete, you may wish to use the Key Protect CLI to remove them. You can identify these keys by name; they will have a vmware_kmip prefix:

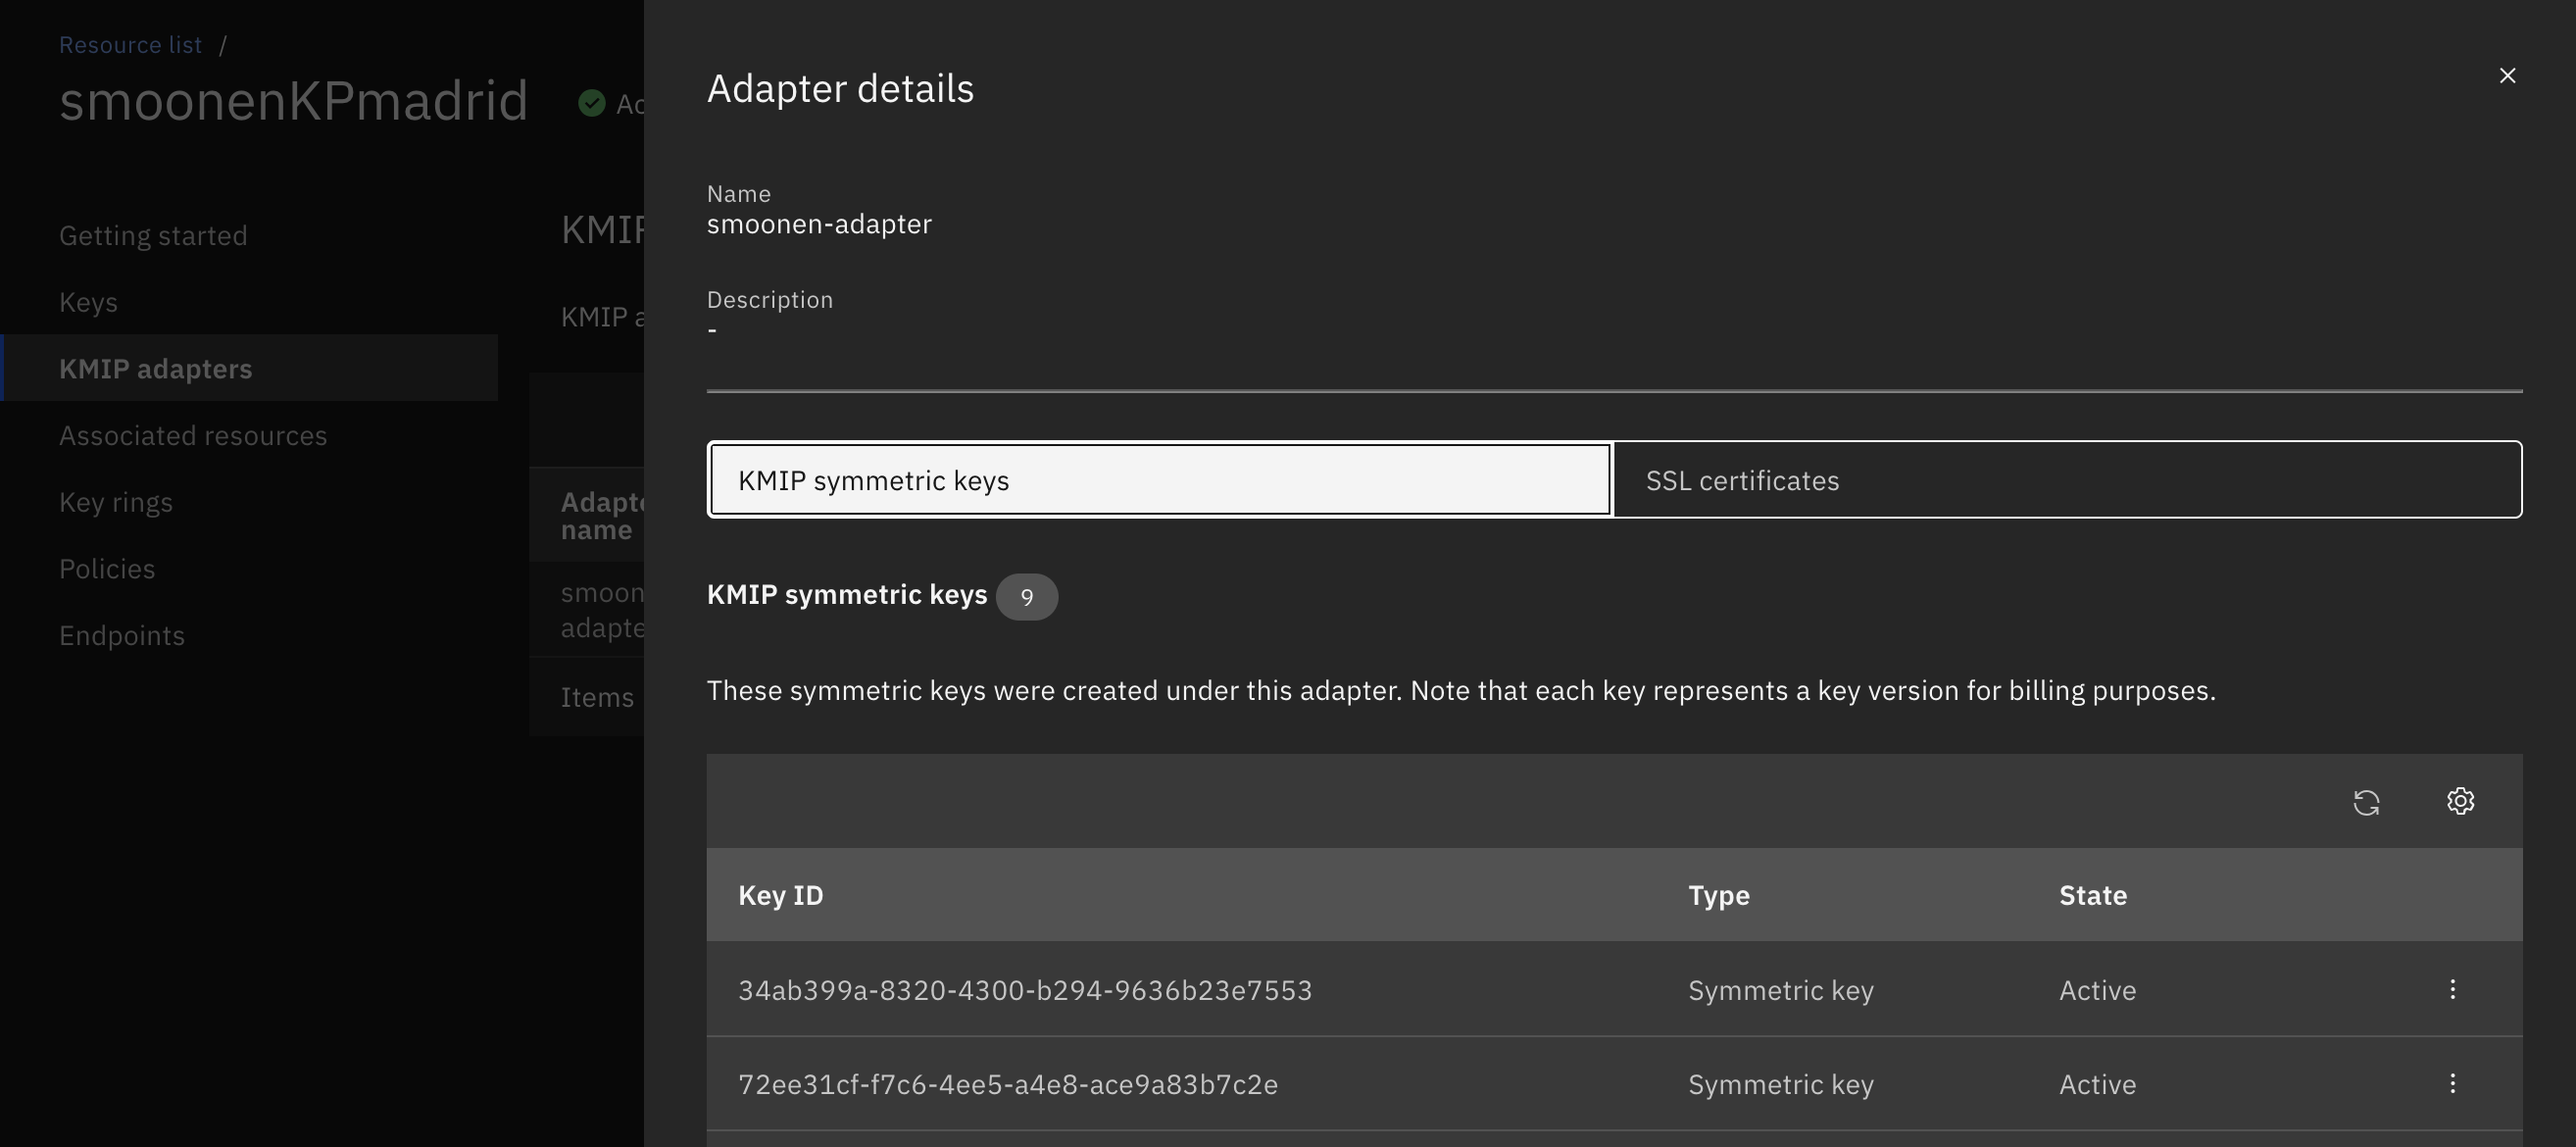
You may notice that there are no standard keys representing the KMIP keys created by the new native adapter. Instead, its keys are visible within the KMIP symmetric keys tab of your KMIP adapter: